Premiere Pro is one of the few programs supporting auto captions in multiple languages. If you want to auto-generate captions in Premiere Pro, you are at the corner of the internet.
Generate Captions in Premiere Pro
Step 01 (workspace):
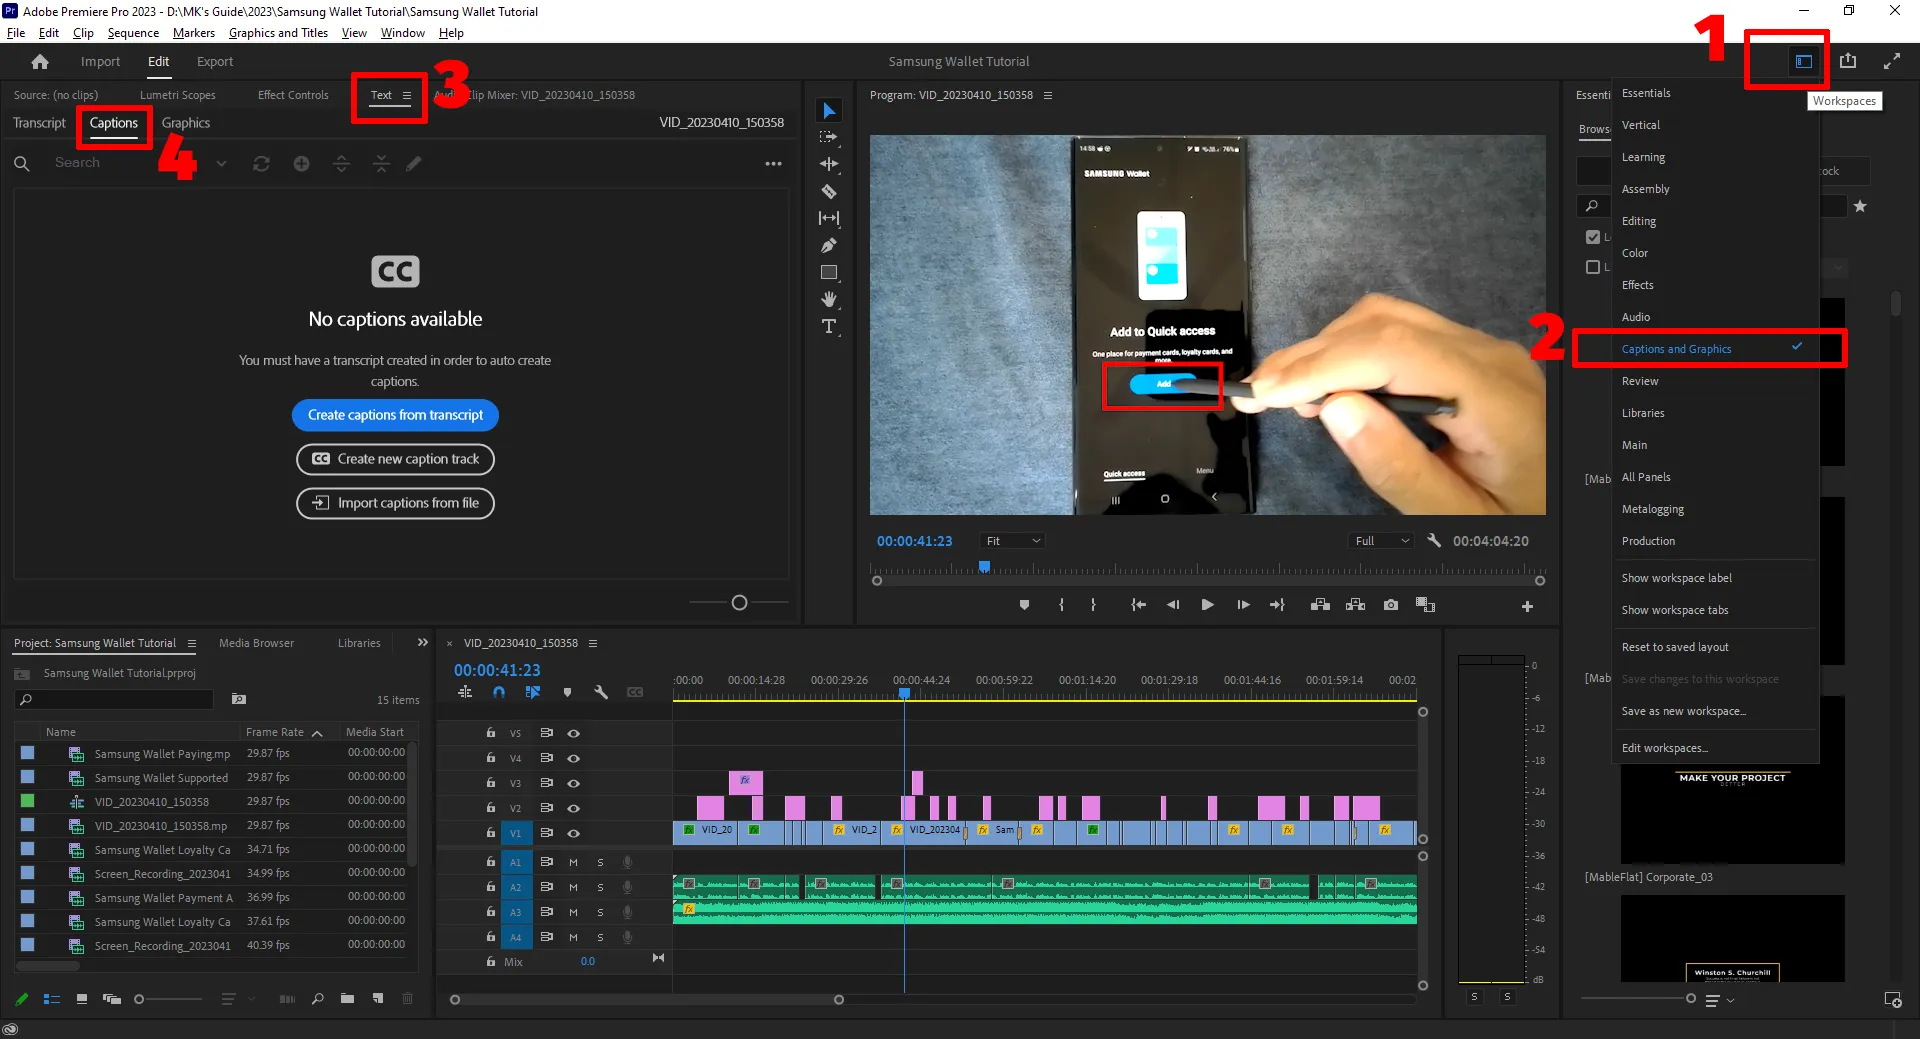
Let’s set up the workspace to make things easier. Follow the below steps:
- Go to Workspaces
- Select Captions and Graphics
- Ensure you see the Text panel on the left
- Go to Window and choose Text if you don’t see it
- Open the Text panel and choose Captions
Step 02 (caption generation):
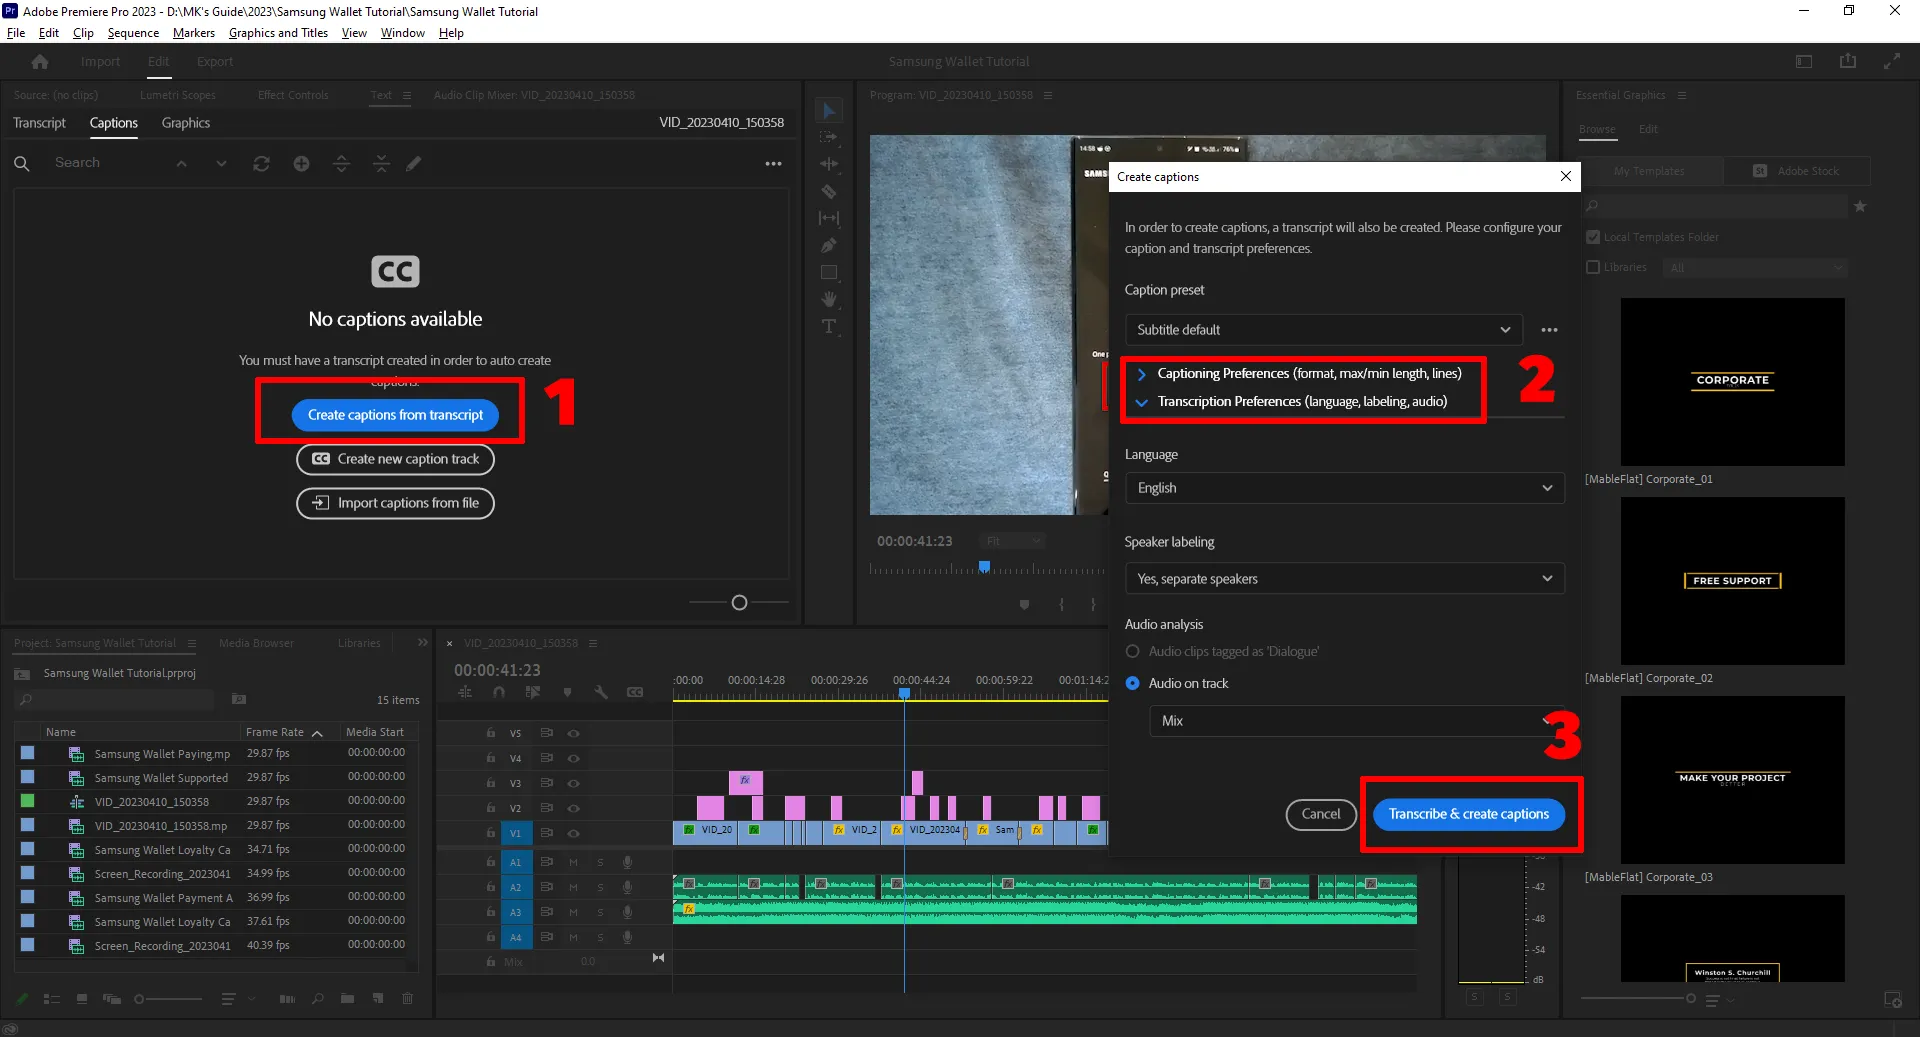
It’s time to auto-caption in Premiere Pro. Click on the “Create captions from transcript” button.
This will open up a window with two sections. In the first section, you can adjust:
- Format (default is subtitle)
- Style
- Maximum length in characters
- Minimum duration in seconds
- Gape between captions in frames
- Lines (single or double)
The second panel lets you set the language. Premiere Pro supports many languages.
You can enable Speaker labeling to label each talking person. However, the function is new and needs time. You can learn about features and limitations on the forum page.
Lastly, if conversations are only on specific audio tracks, you can choose them in this panel. This will help Premiere Pro generate accurate results faster.
When ready, hit the “Transcribe and create captions” button.
After a few seconds, you will see a yellow track in the timeline and generated subtitles in the Text and preview panels.
Editing captions
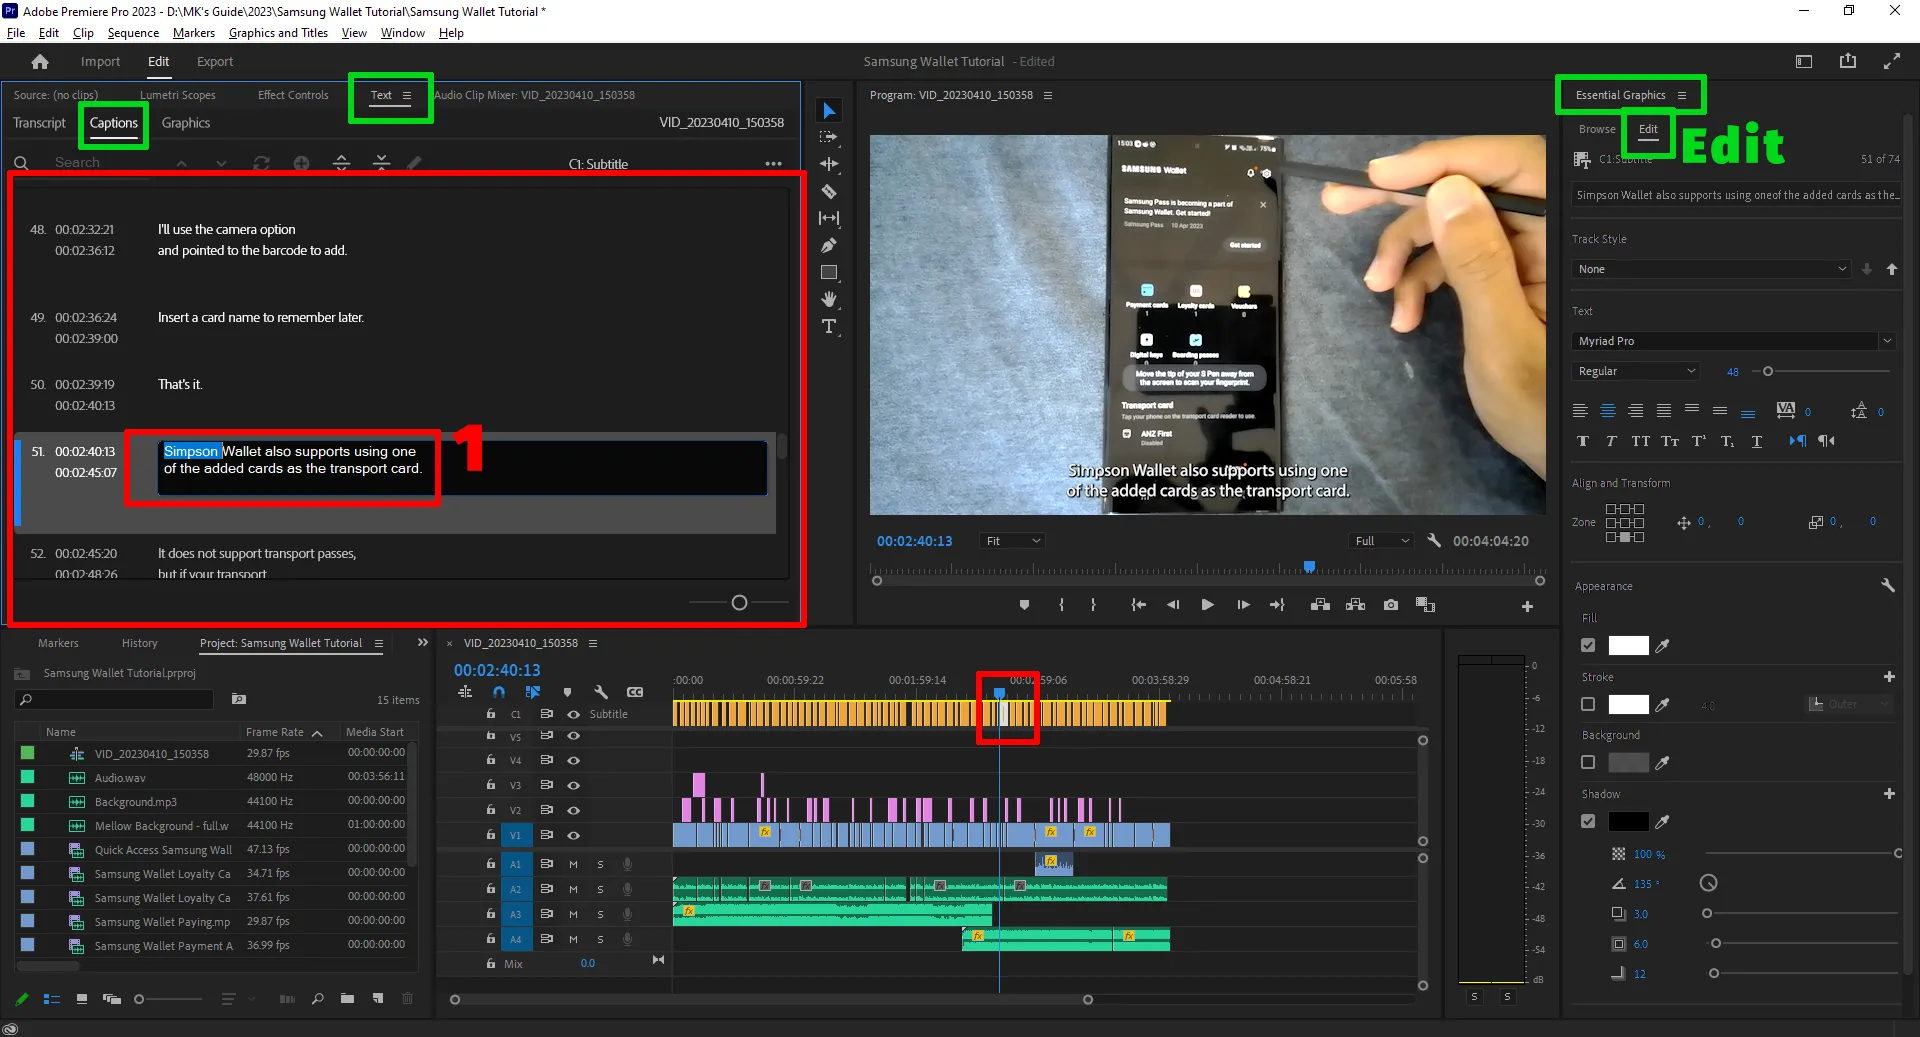
You will see the text and time in the “Captions” tab. To fix a mistake, double-click on a caption row.
The play head in the timeline will position on that track. Edit the text in the “Captions” tab, and the subtitle will edit automatically.
You can also double-click on the subtitle in the preview window and edit it. To adjust the timing, drag or shrink the clip with the mouse button clicked.
You can merge two text rows using the buttons on the top next to the search function.
Text settings
Premiere Pro lets you edit a single caption clip and all captions together. In the same “Graphics and Captions” workspace, highlight the caption clip(s) to edit.
Ensure the “Essential Graphics” panel is open. If you don’t see it, go to the Window menu and enable it. Ensure the “Edit” section is active.
In this panel, you can edit the subtitle position, font, size, fill, stroke, background, and shadow.
While you are here, my Premiere Pro and Rush comparison is worth reading.
Exporting subtitles
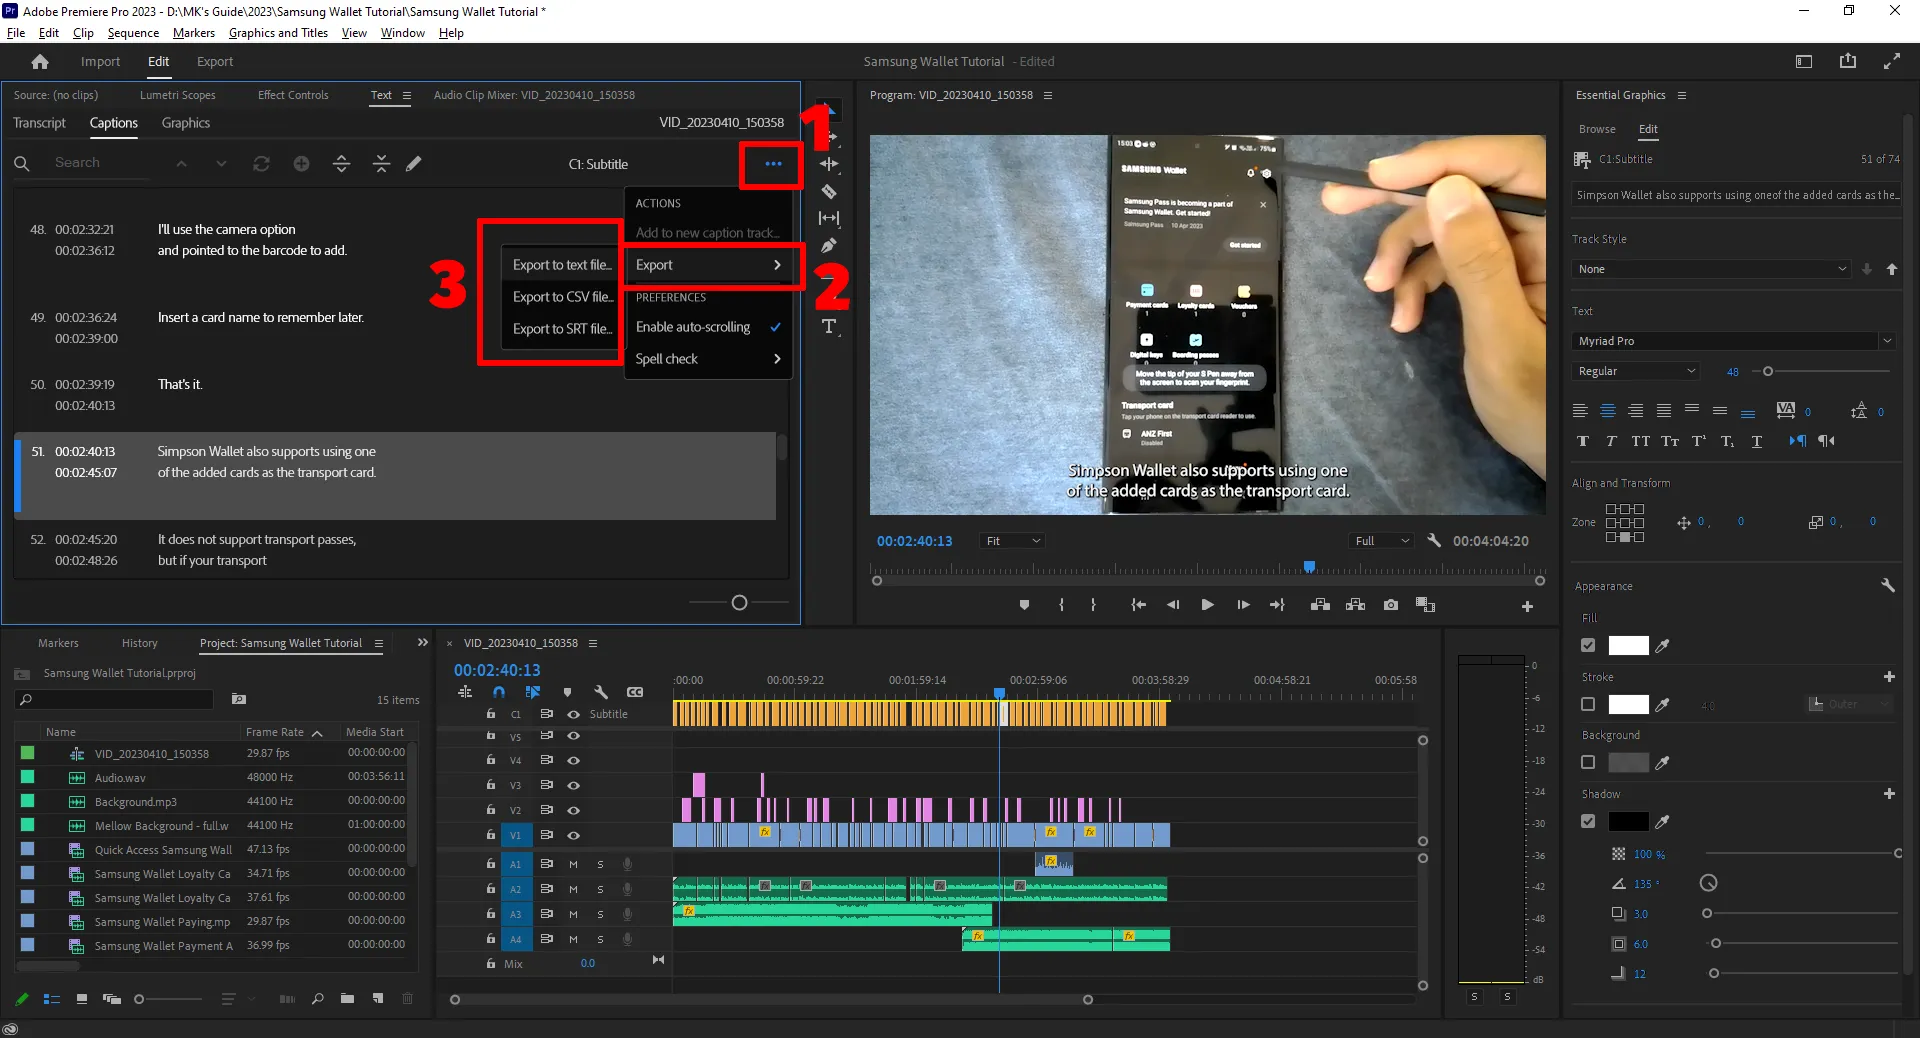
Premiere Pro supports exporting subtitles into TXT, CSV, and SRT formats. Those formats are supported on social media websites.
To export subtitles, follow the steps below:
- Click on the ellipsis in the Captions tab
- Hover over Export
- Choose a file format
- Set a destination and file name
- Click Save
Manually add captions

Premiere Pro has a fantastic tool for writing captions manually. In the Text panel, instead of creating captions, we will create a new caption track. This will add a track to the timeline.
To add captions, click on the “+” icon on the top. Add your text in the subtitle box provided. Drag the subtitle clip in the timeline to adjust the position.
Repeat the process to cover the whole video. You can then follow the above section to edit the text’s appearance.
Languages Premiere Pro auto-caption supports
Premiere Pro can generate captions in English, but you can download Mandarin, Cantonese, Spanish, German, French, Japanese, Portuguese, Korean, Italian, Hindi, Norwegian, Swedish, and Dutch.
Kapwing and Veed (online video editors) have more languages if yours is not listed here. I’ve compared both; check it out if you are interested.
Madhsudhan Khemchandani has a bachelor’s degree in Software Engineering (Honours). He has been writing articles on apps and software for over five years. He has also made over 200 videos on his YouTube channel. Read more about him on the about page.