The open-source note-taking program, Joplin, supports notes syncing for free, but setting up is slightly challenging.
If you are struggling, I have compiled this nifty guide on how to sync Joplin Notes across devices for free.
Note: I will use OneDrive to sync files, but the Dropbox process is similar.
Sync Joplin Notes video
Here is a quick video that shows how to sync notes. I made this video for my YouTube channel, and you can check it on YouTube or watch it here to learn to sync.
Setting up Joplin sync on PC
Step 01
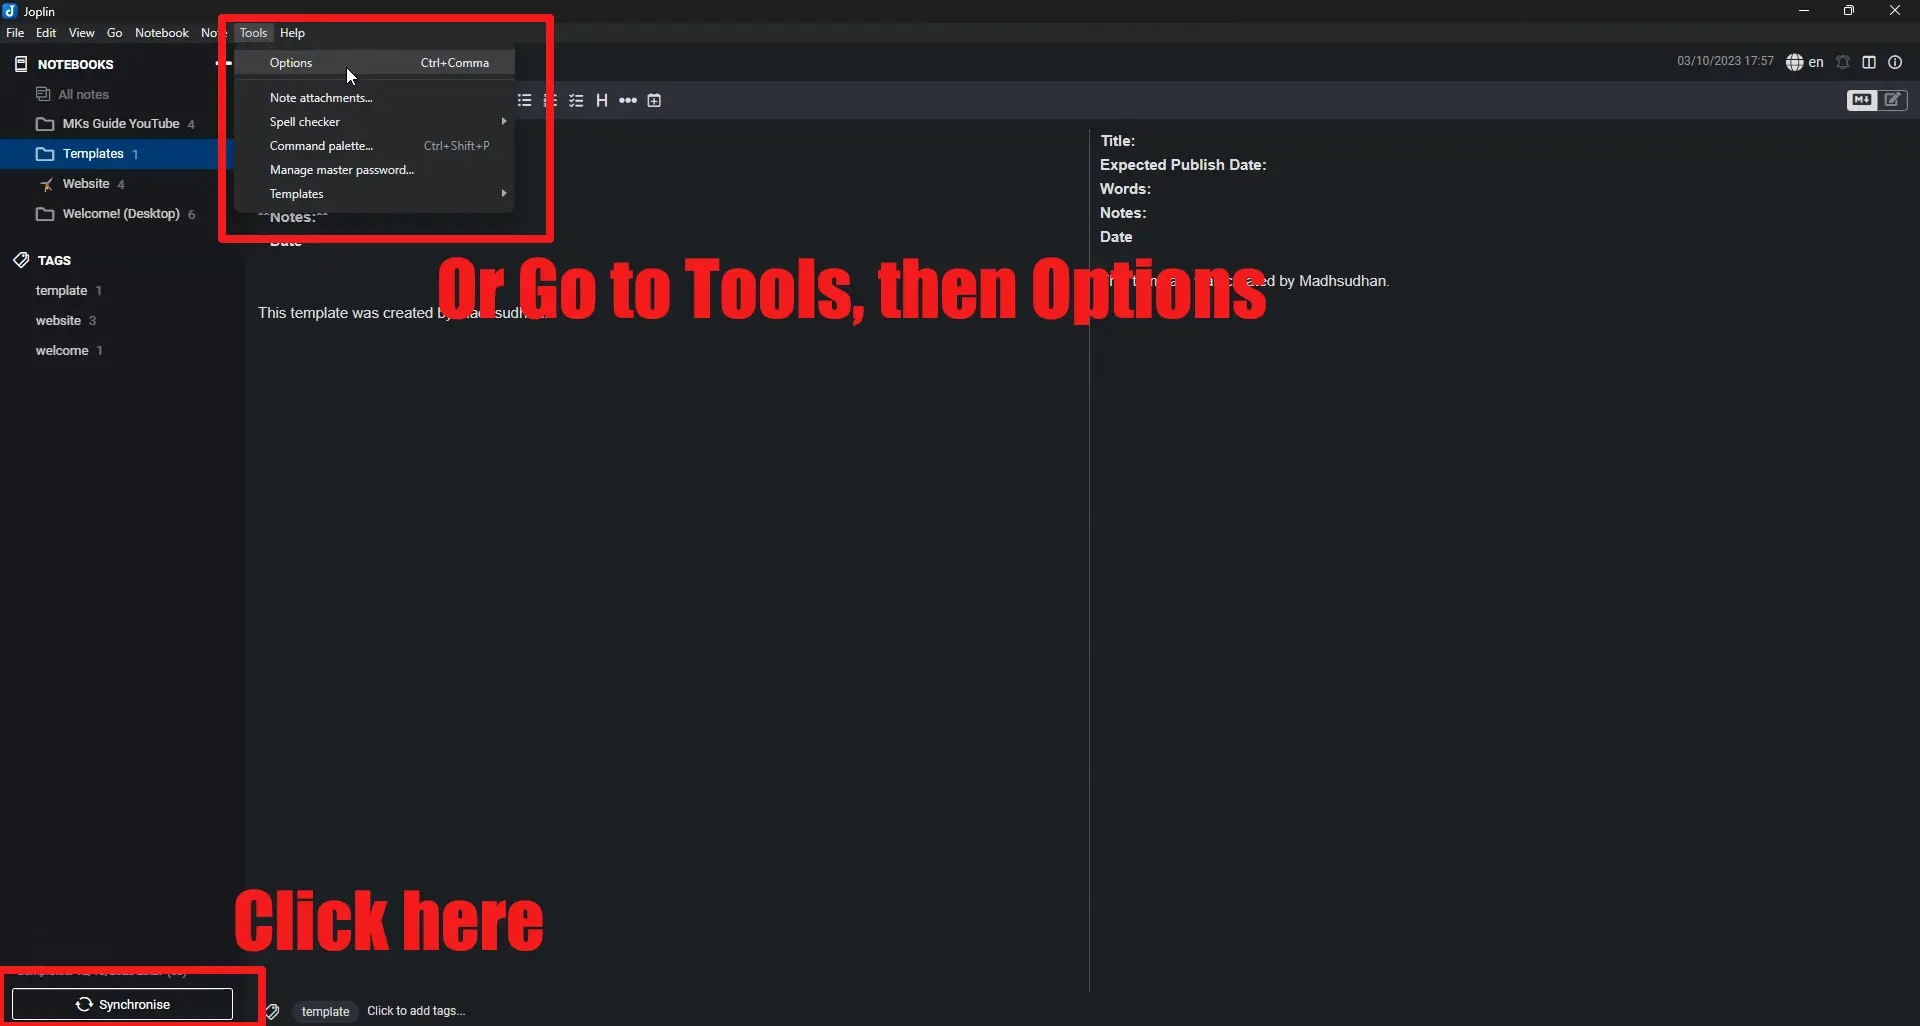
Ensure you have Joplin opened. Either click the “Synchronize” button located at the bottom left or go to “Tools” and then “Options.”
Step 02
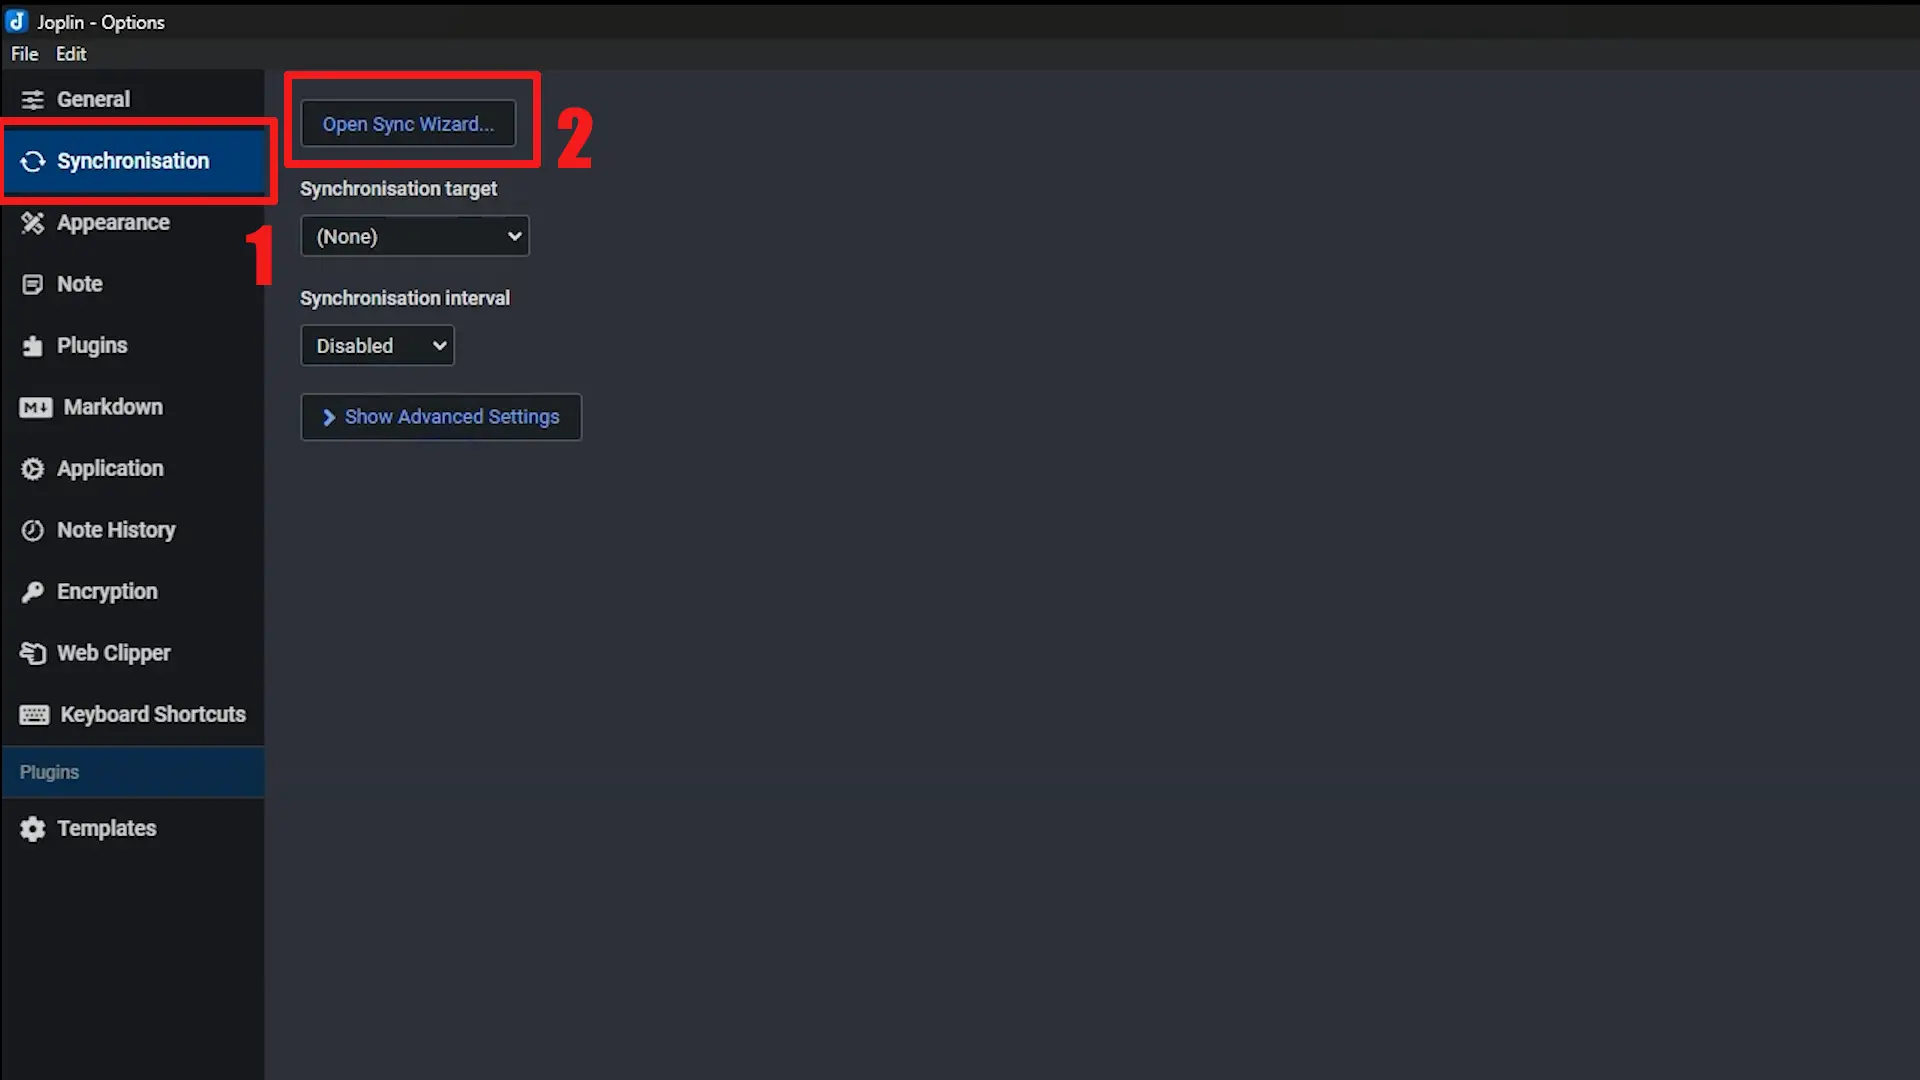
Go to the “Synchronization” tab. Don’t worry if the options on this screen are different. Click this “Open Sync Wizard” button.
Step 03
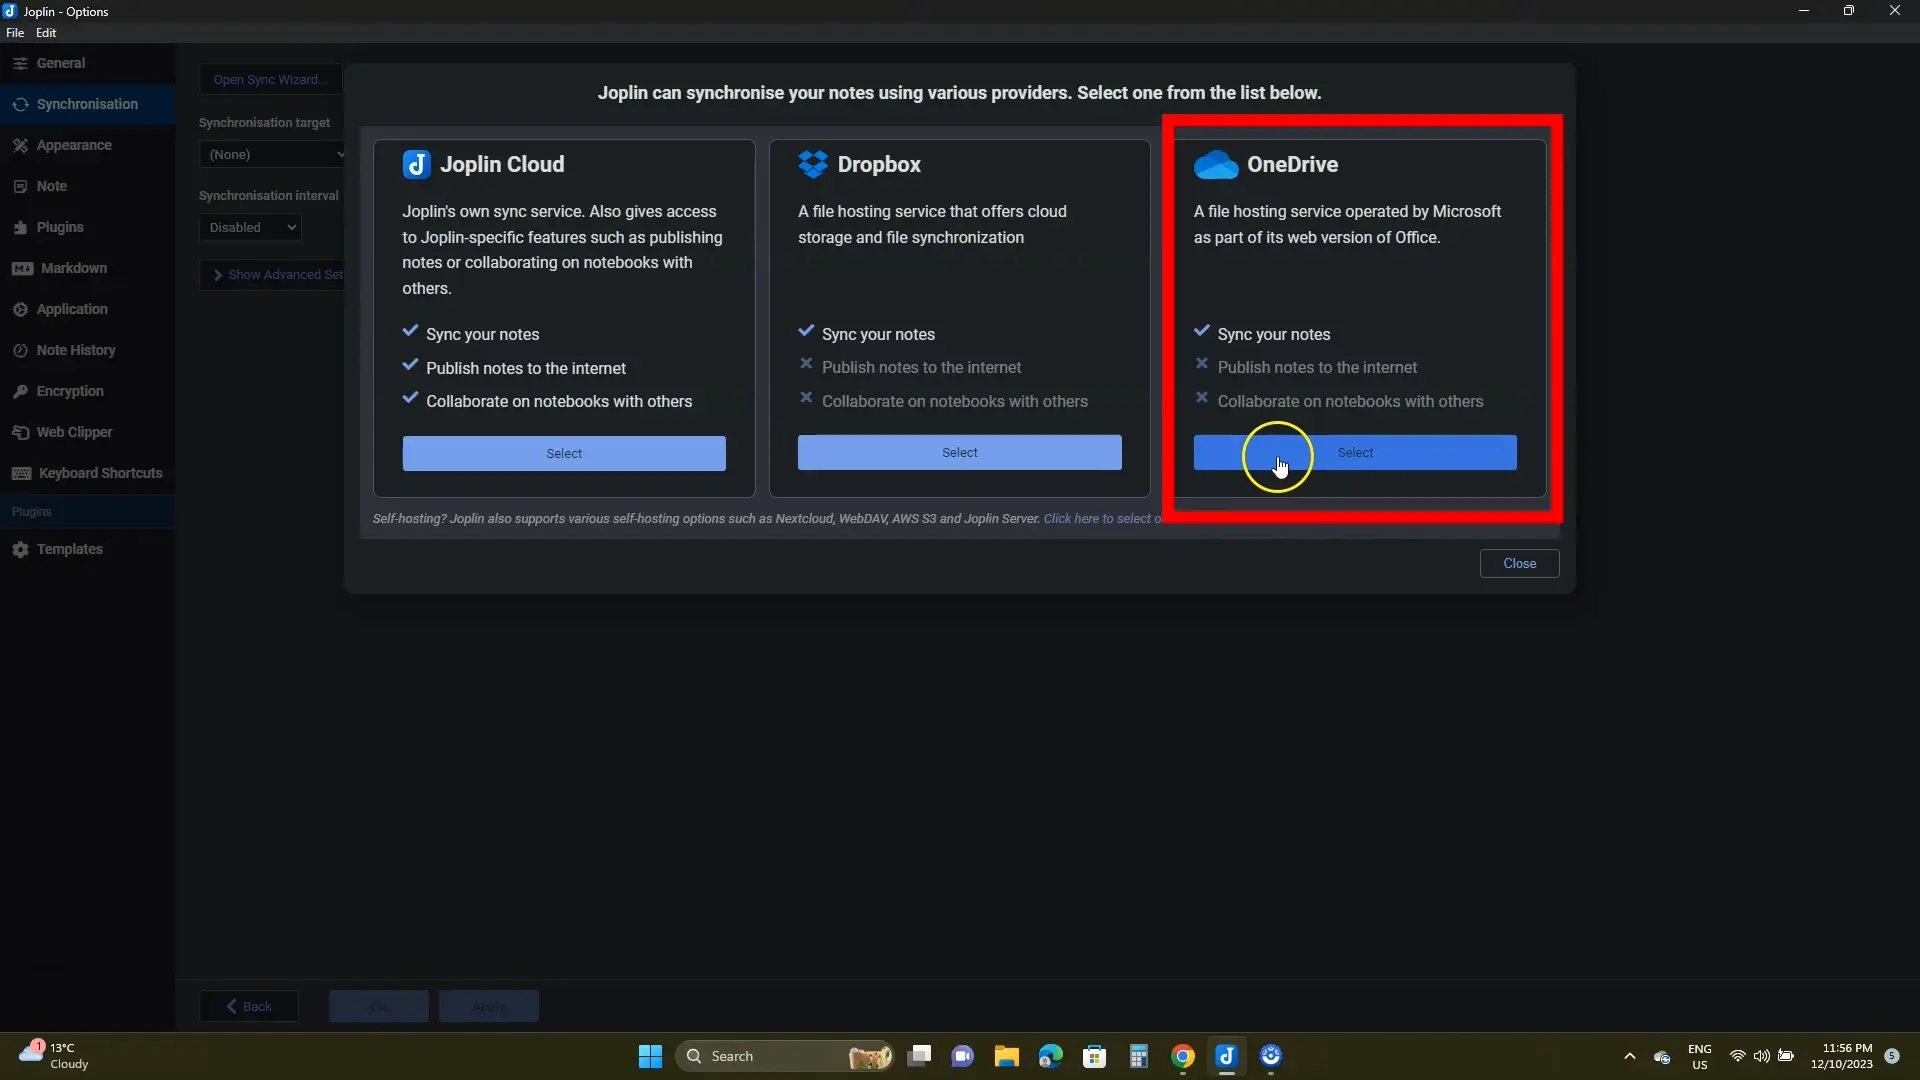
Select OneDrive from the list. You can also choose Dropbox.
Step 04
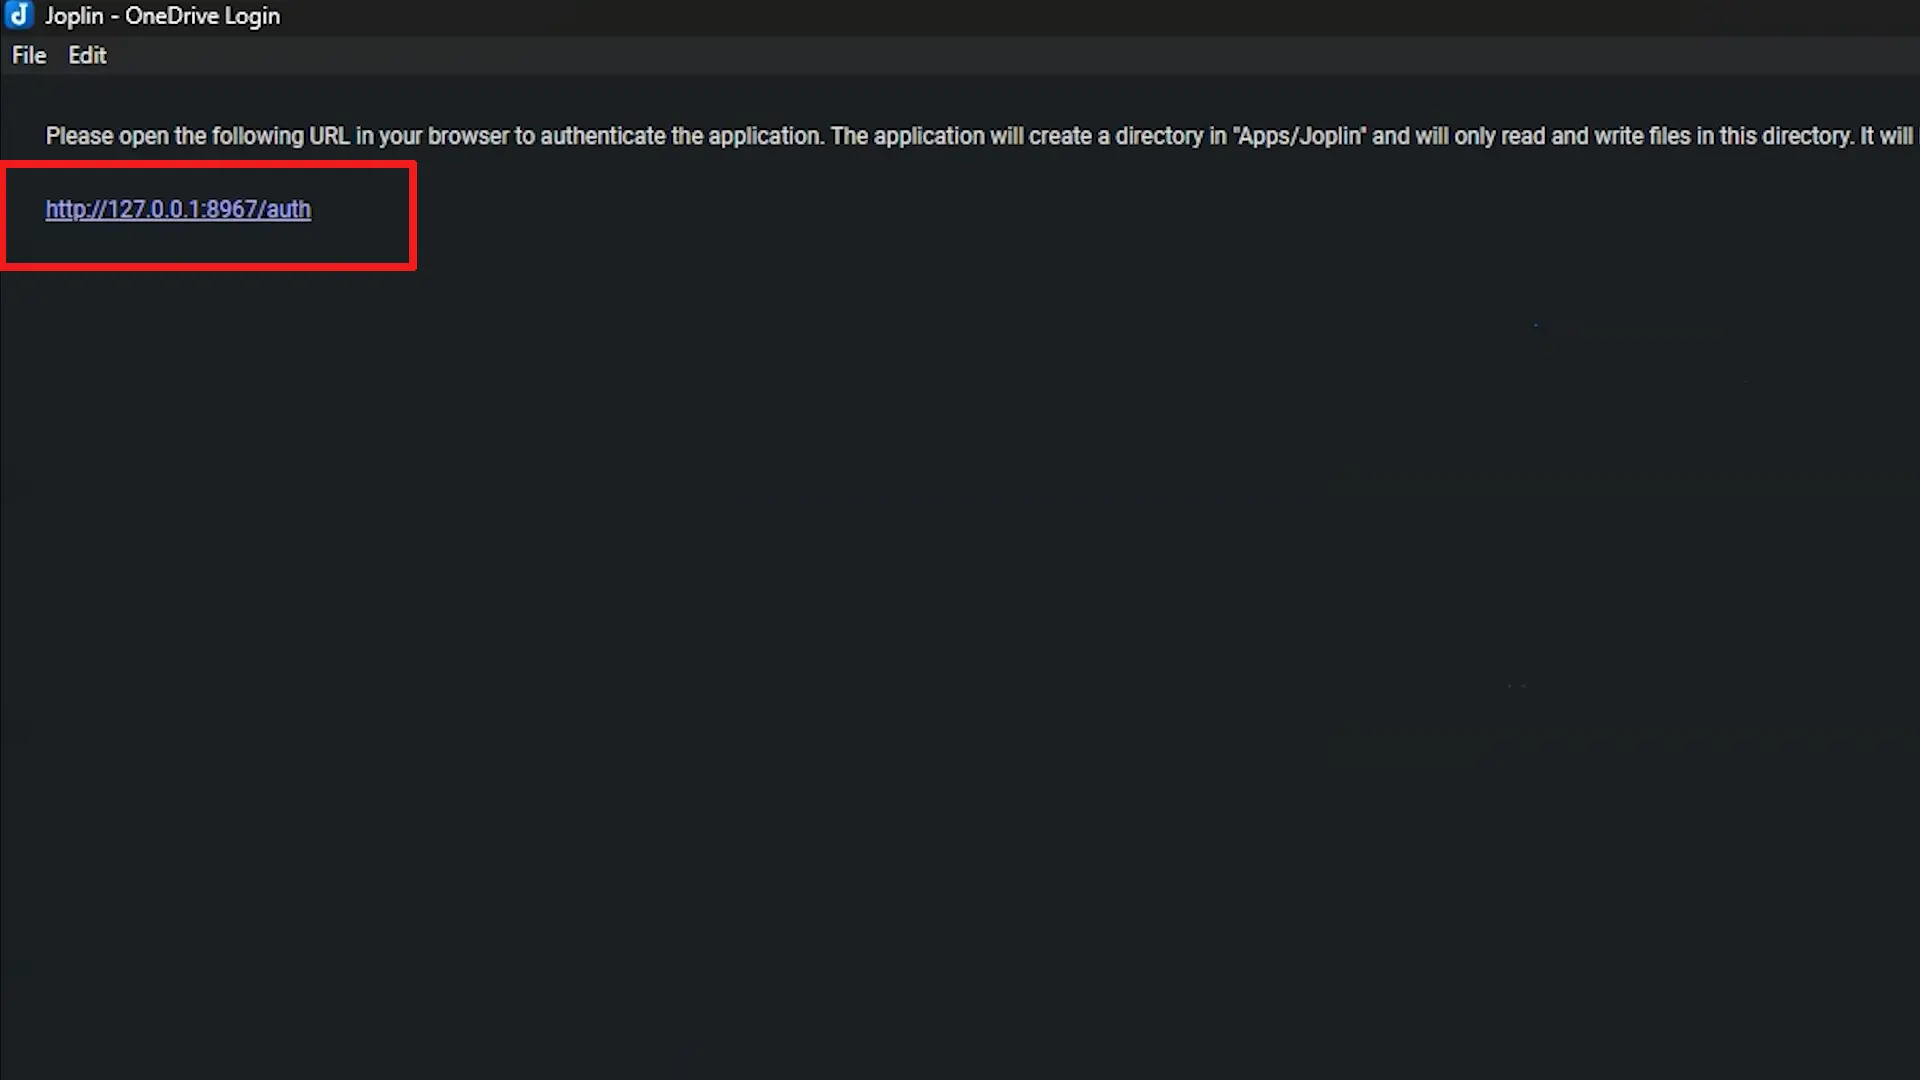
A new window with a link will open up. Click this link and sign in with your Microsoft account. Once signed in, you will see the message on the top. To further ensure, go to Joplin and see a similar message.
Step 05
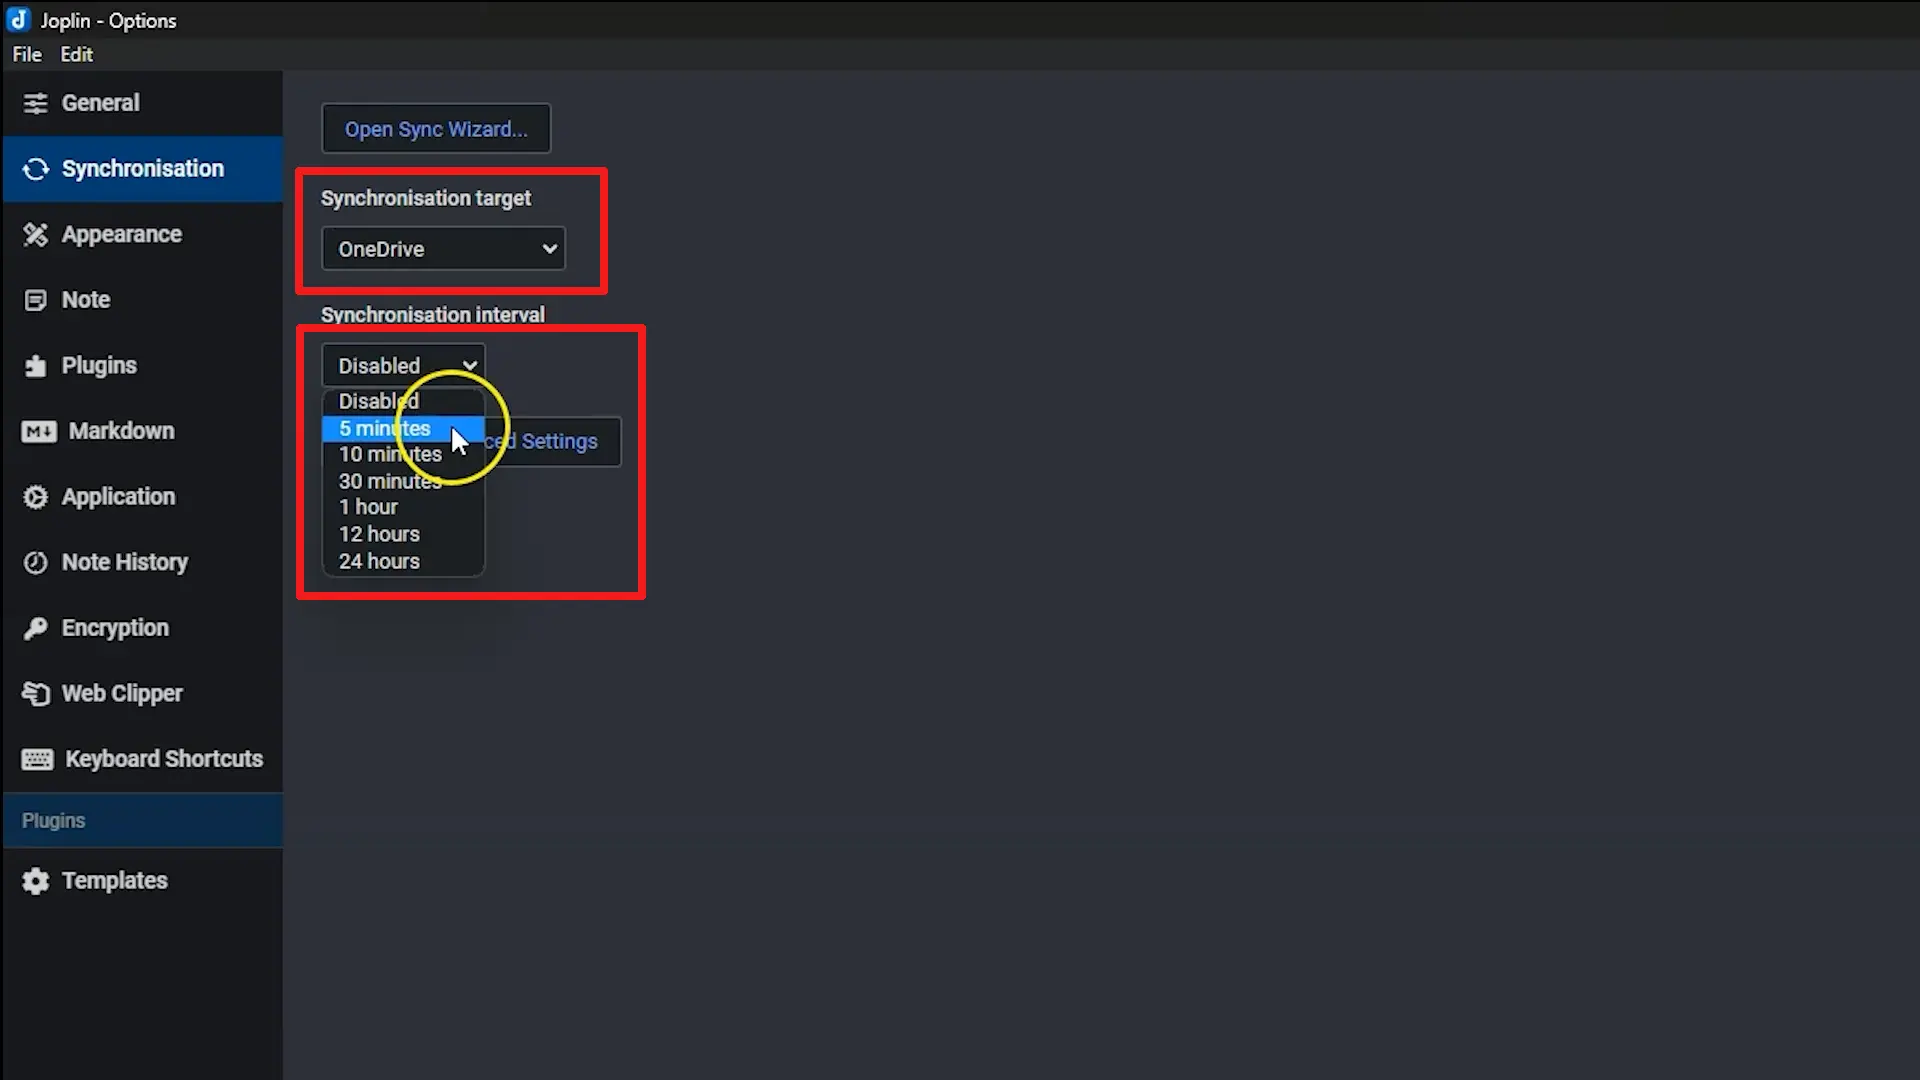
We have a few things to set up. Ensure OneDrive is selected from the list.
You can manually sync files by clicking the “Synchronize” button on the edit interface and setting the time interval here. I will set it to every 5 minutes.
You can still click the “Synchronize” button sync at any time. Then, there are some advanced options. I won’t touch them, but those may be helpful in your situation. Hit the “Apply” button.
Onwards, clicking the “Synchronize” button on the main dashboard will start the sync process. The sync will also auto-start start on time. The last sync time is displayed next to the “Synchronize” button.
Read also: How to Create Templates in Joplin
Syncing Joplin Cloud on another PC
Using the same process mentioned in the above section, open Joplin and set up sync. Ensure to use the same Microsoft account on another device.
Step 01
Click the same “Synchronize” button to open the same wizard.
Step 02
Select OneDrive and follow the same process of signing up with your Microsoft account.
Step 03
You will see the same message in your browser and the Joplin app. Once the account is set up, you will see Joplin populating the notes from the cloud.
You can edit something here, click the “Sync” button, or wait for it to auto-sync and find changes on other devices.
Setting up Joplin sync on mobile
Syncing Joplin on mobile is similar. On the left side is my iPhone, and on the right is my Android phone.
Step 01
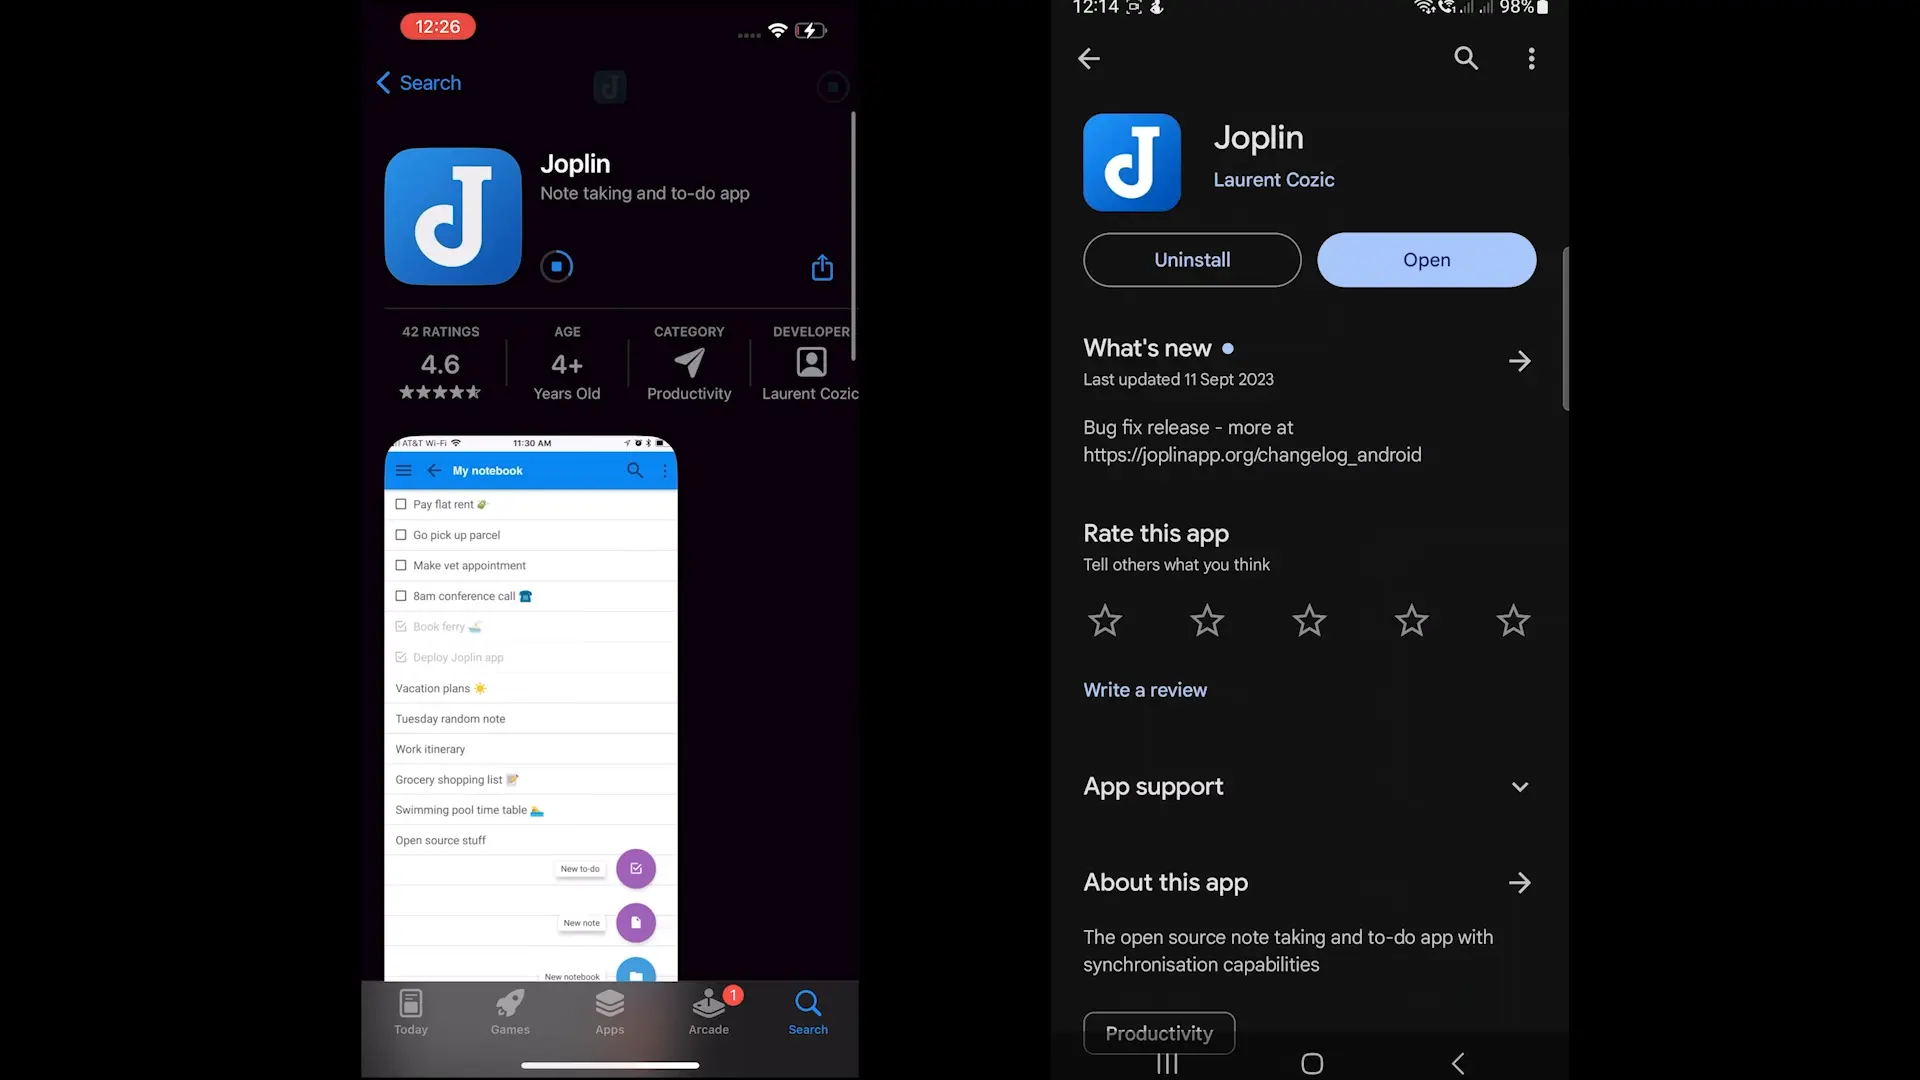
Install Joplin from the App Store and open it.
Step 02
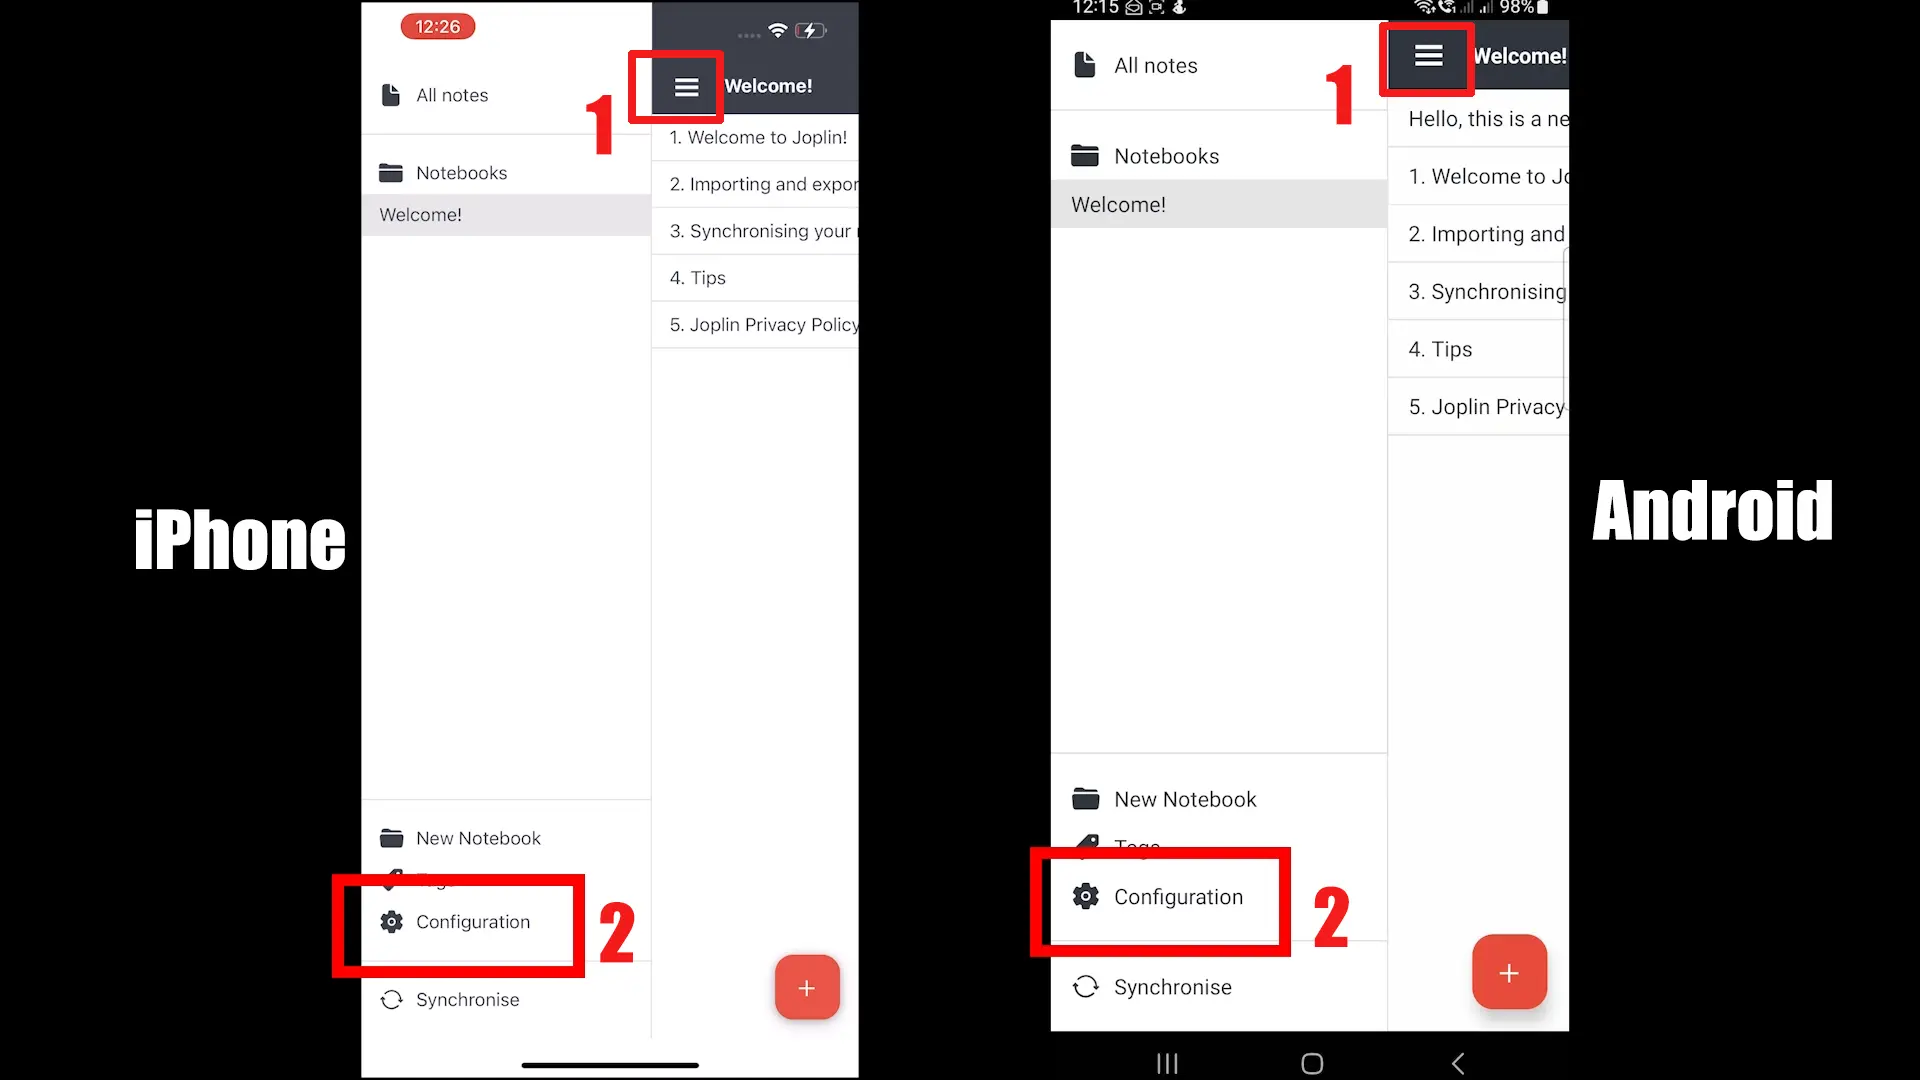
Click the “Menu” button and then “Configuration.”
Step 03
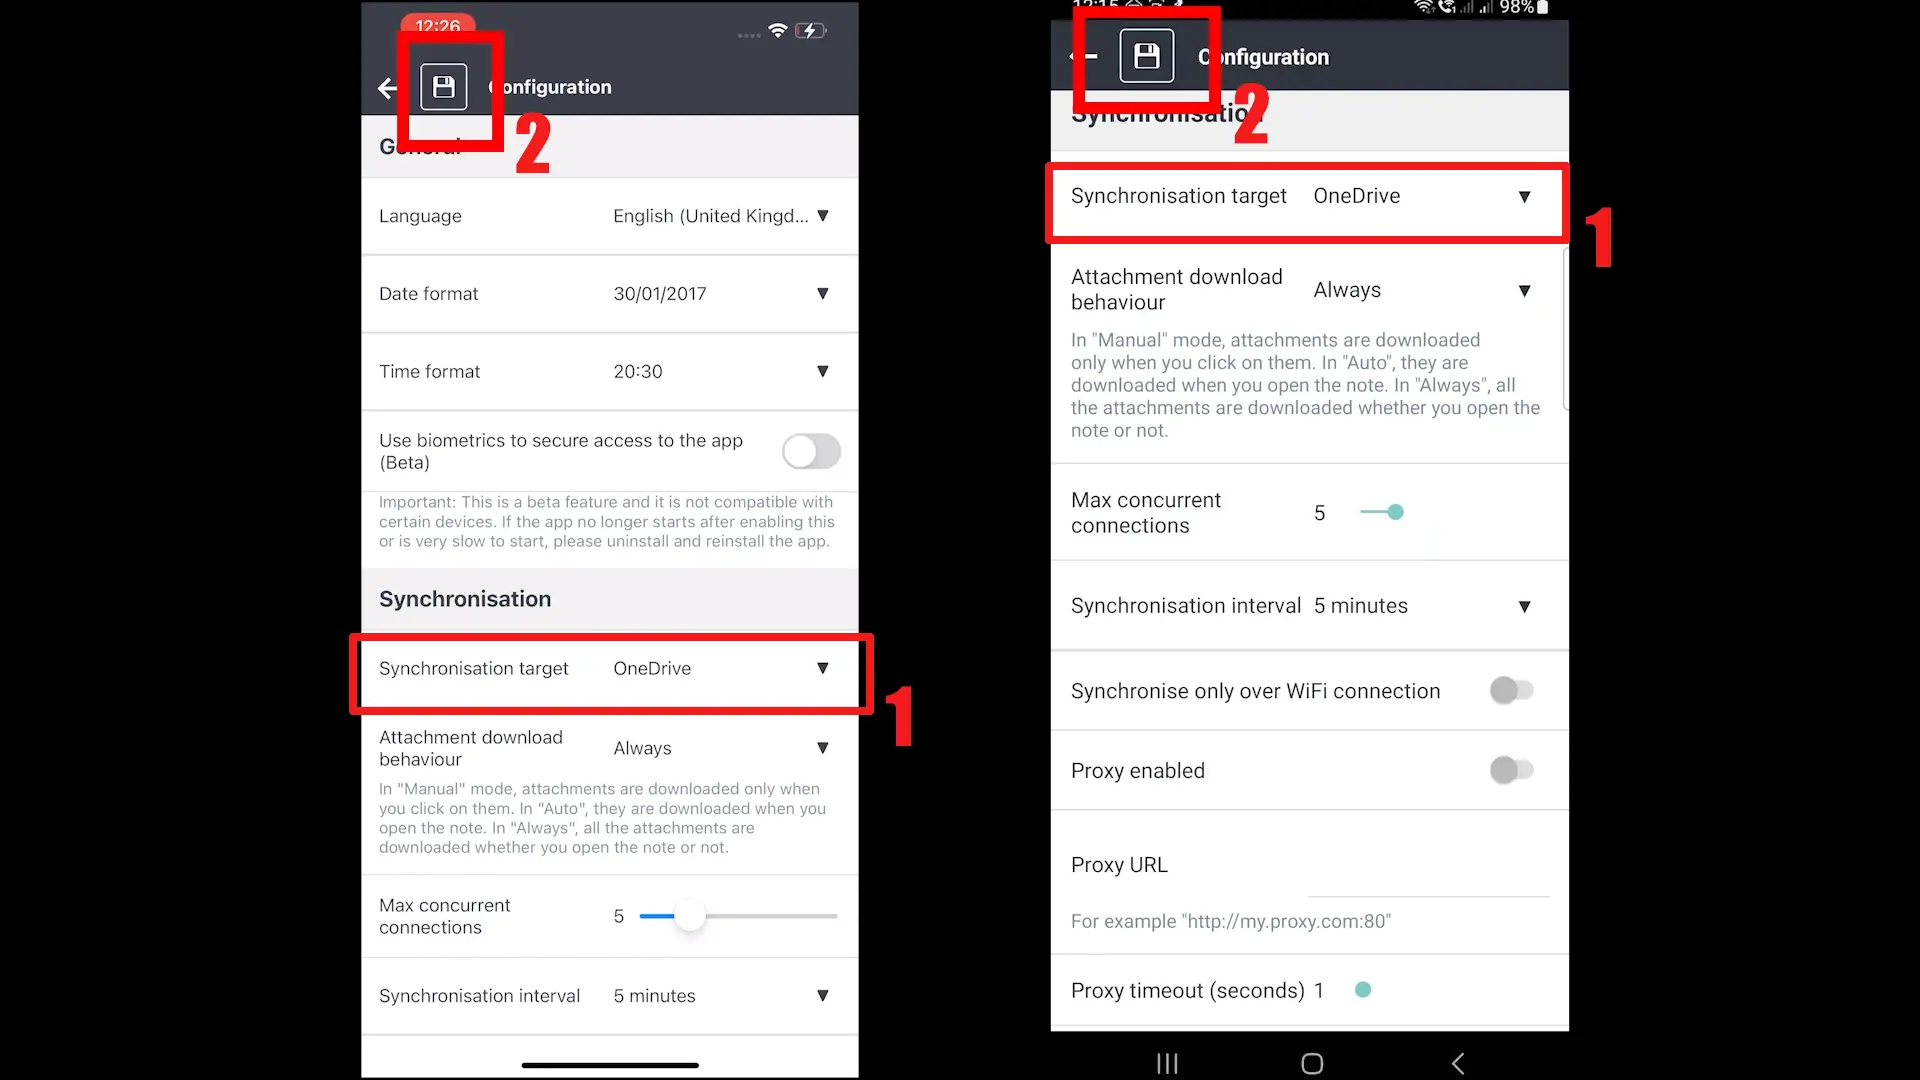
From the Target dropdown, choose OneDrive and tap the “Save” button on the top.
Step 04
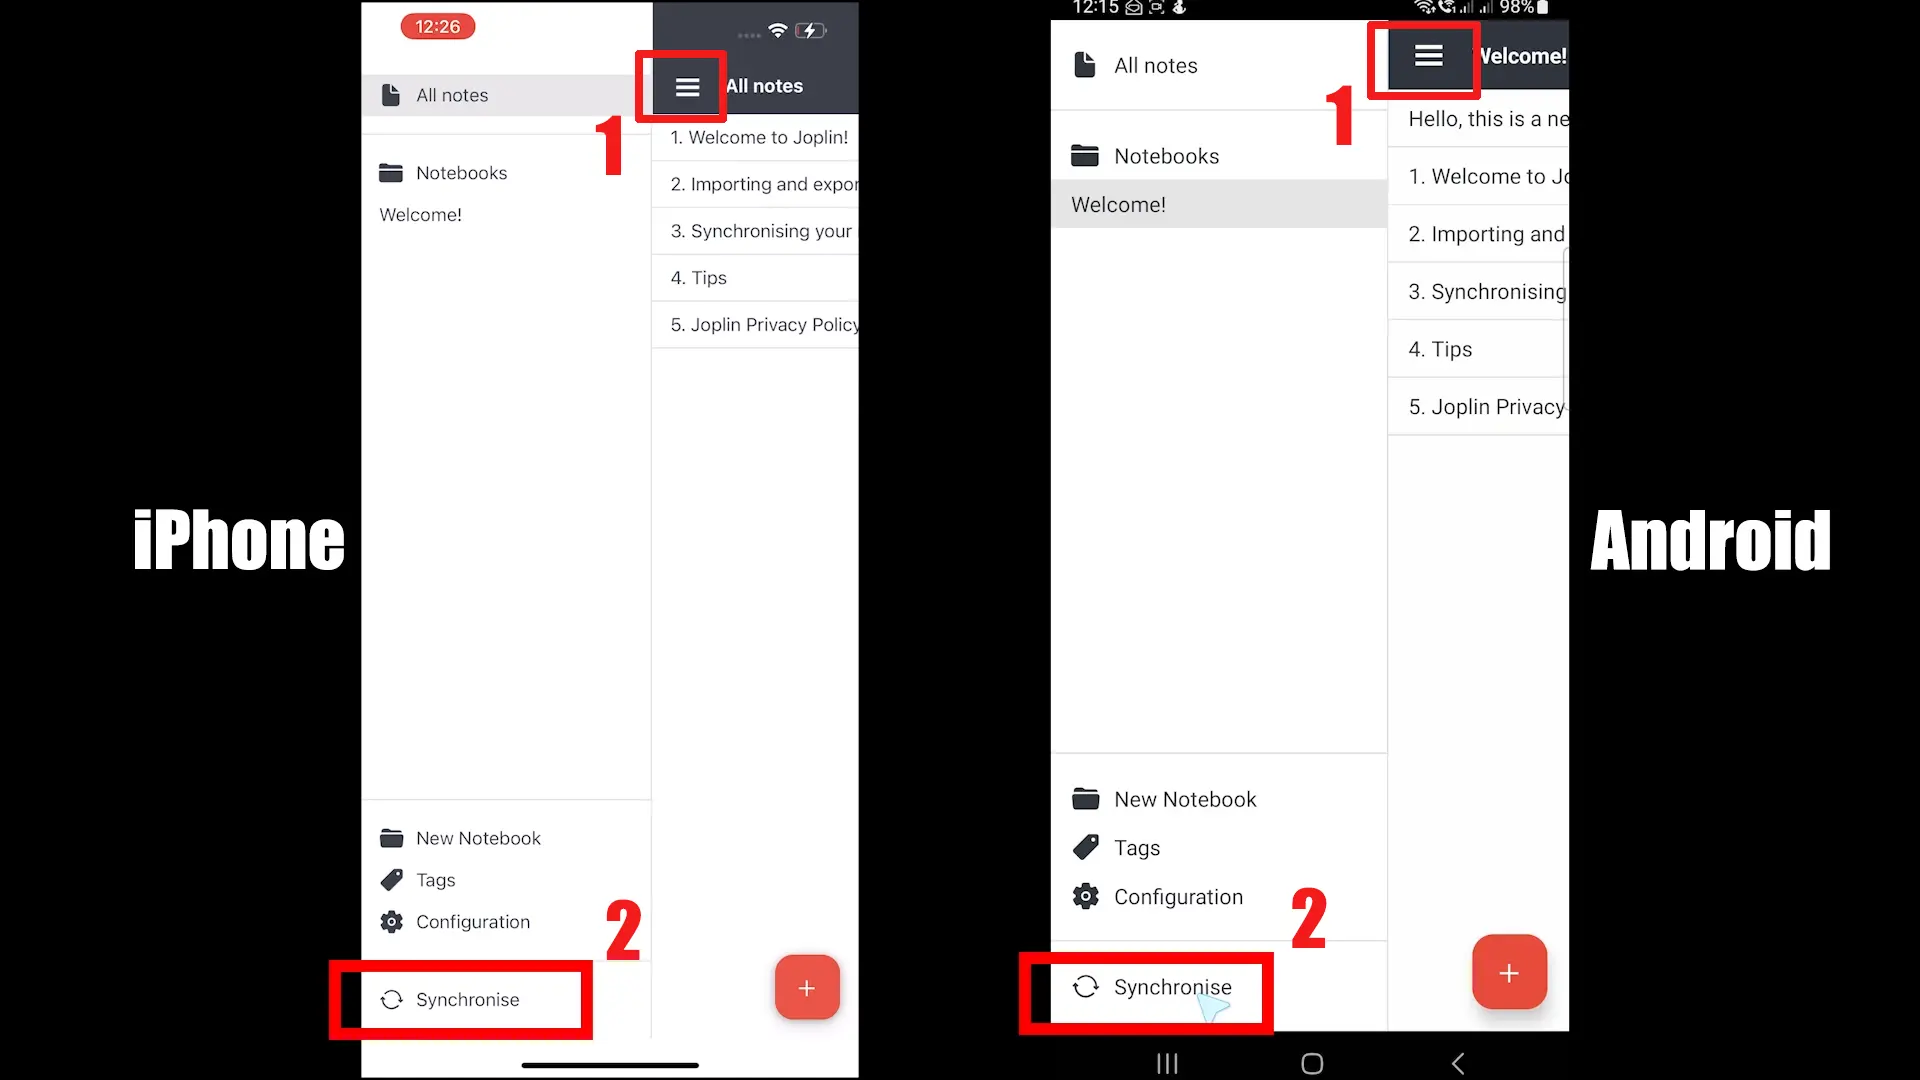
Go back, touch the “Menu” button again, and tap the “Synchronize” button. This will ask you to sign in to the same Microsoft account. Follow the steps. Once the account is signed in, you will see the downloaded notes.
Step 05
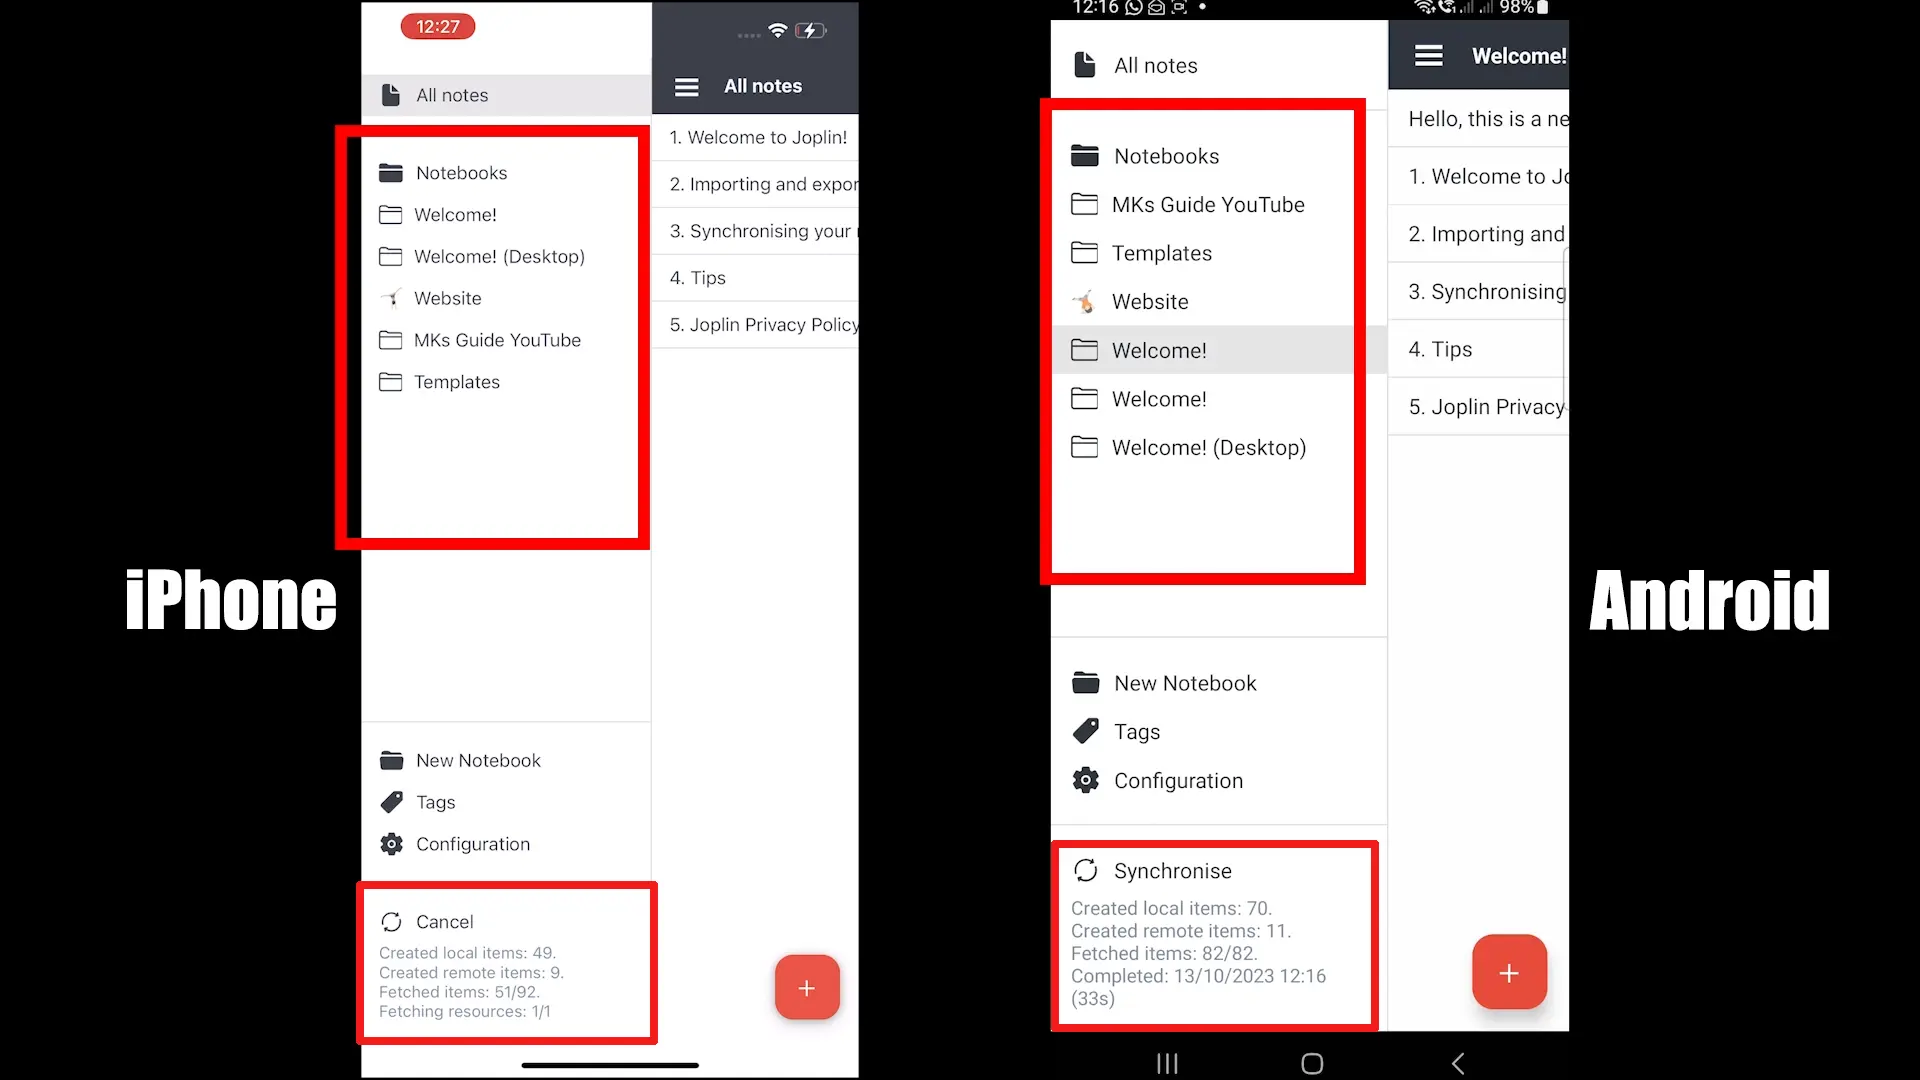
Touch the “Sync” button after making changes, and when the files are synced, you will see the changes everywhere.
Before you go: Joplin versus Notion
Summary
Joplin Cloud is a premium subscription, but the app offers free ways to sync notes across devices using your Microsoft and Dropbox accounts. Give Joplin permission to save notes and see all your notes on all your devices.
This is it for this guide. I hope it helped. Please let me know in the comments if you need any help.
Madhsudhan Khemchandani has a bachelor’s degree in Software Engineering (Honours). He has been writing articles on apps and software for over five years. He has also made over 200 videos on his YouTube channel. Read more about him on the about page.
Nice