The major difference between Photopea and Photoshop is that the former is free. It has the power to make many edits. How to remove the background in Photopea?
In this article, we take a ride and cover the 4 ways to remove the background in Photopea.
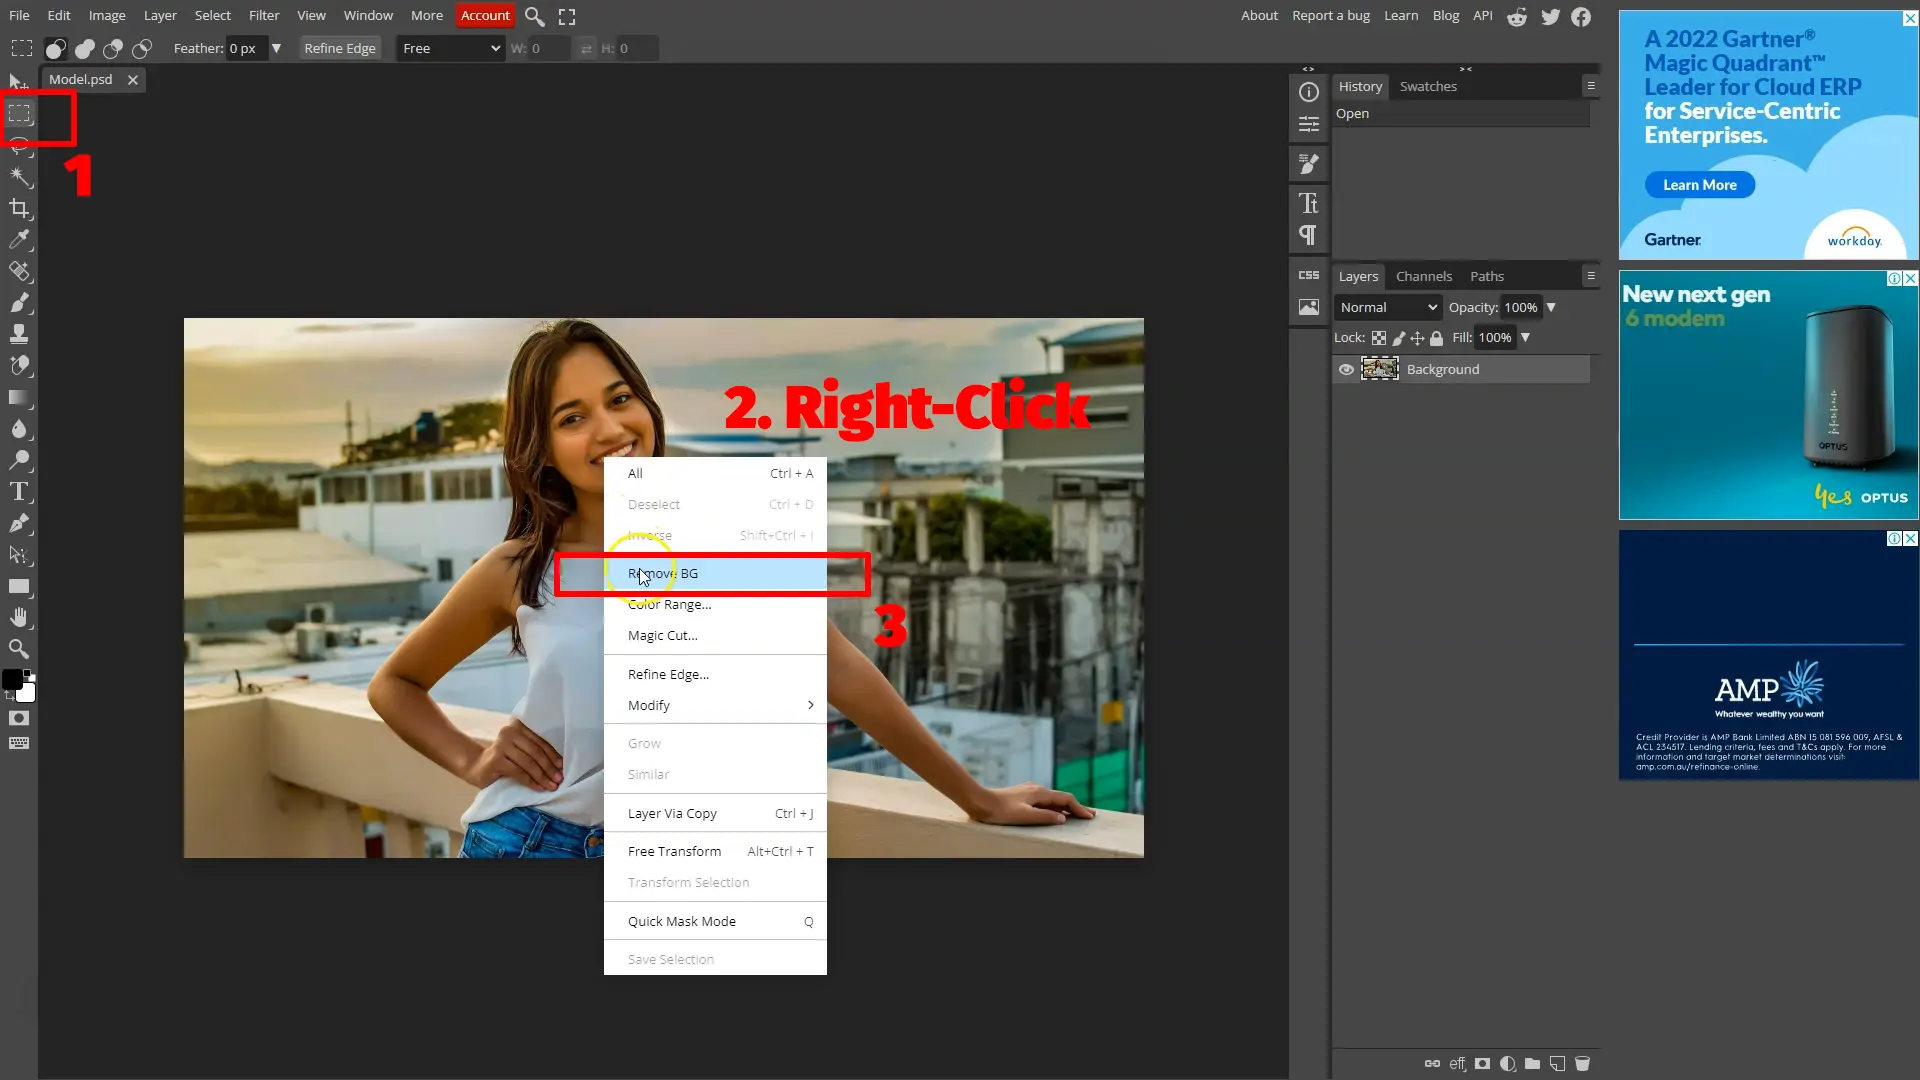
Remove BG
Best for simple to medium-complex images. Works in a few clicks.
The first method is great for many image types and works in a few simple steps. The tool we’ll use is called “Remove BG.” Here are the steps:
- Select a selection tool (any will work)
- Select the layer you want to edit
- Right-click on the image
- Click on the option Remove BG
This will take a few seconds, and the program will automatically delete the background. Photopea is advanced and works like a charm.
However, if the tool doesn’t work correctly, you can see and edit the selection before deleting the background. Follow the steps:
- Enable either Magic Wand, Quick Selection, or Object Selection tool
- Click on the Subject option in the top bar
The app will select the subject. If you are happy, right-click on the selection and click the Layer Via Copy button to copy the subject onto a different layer.
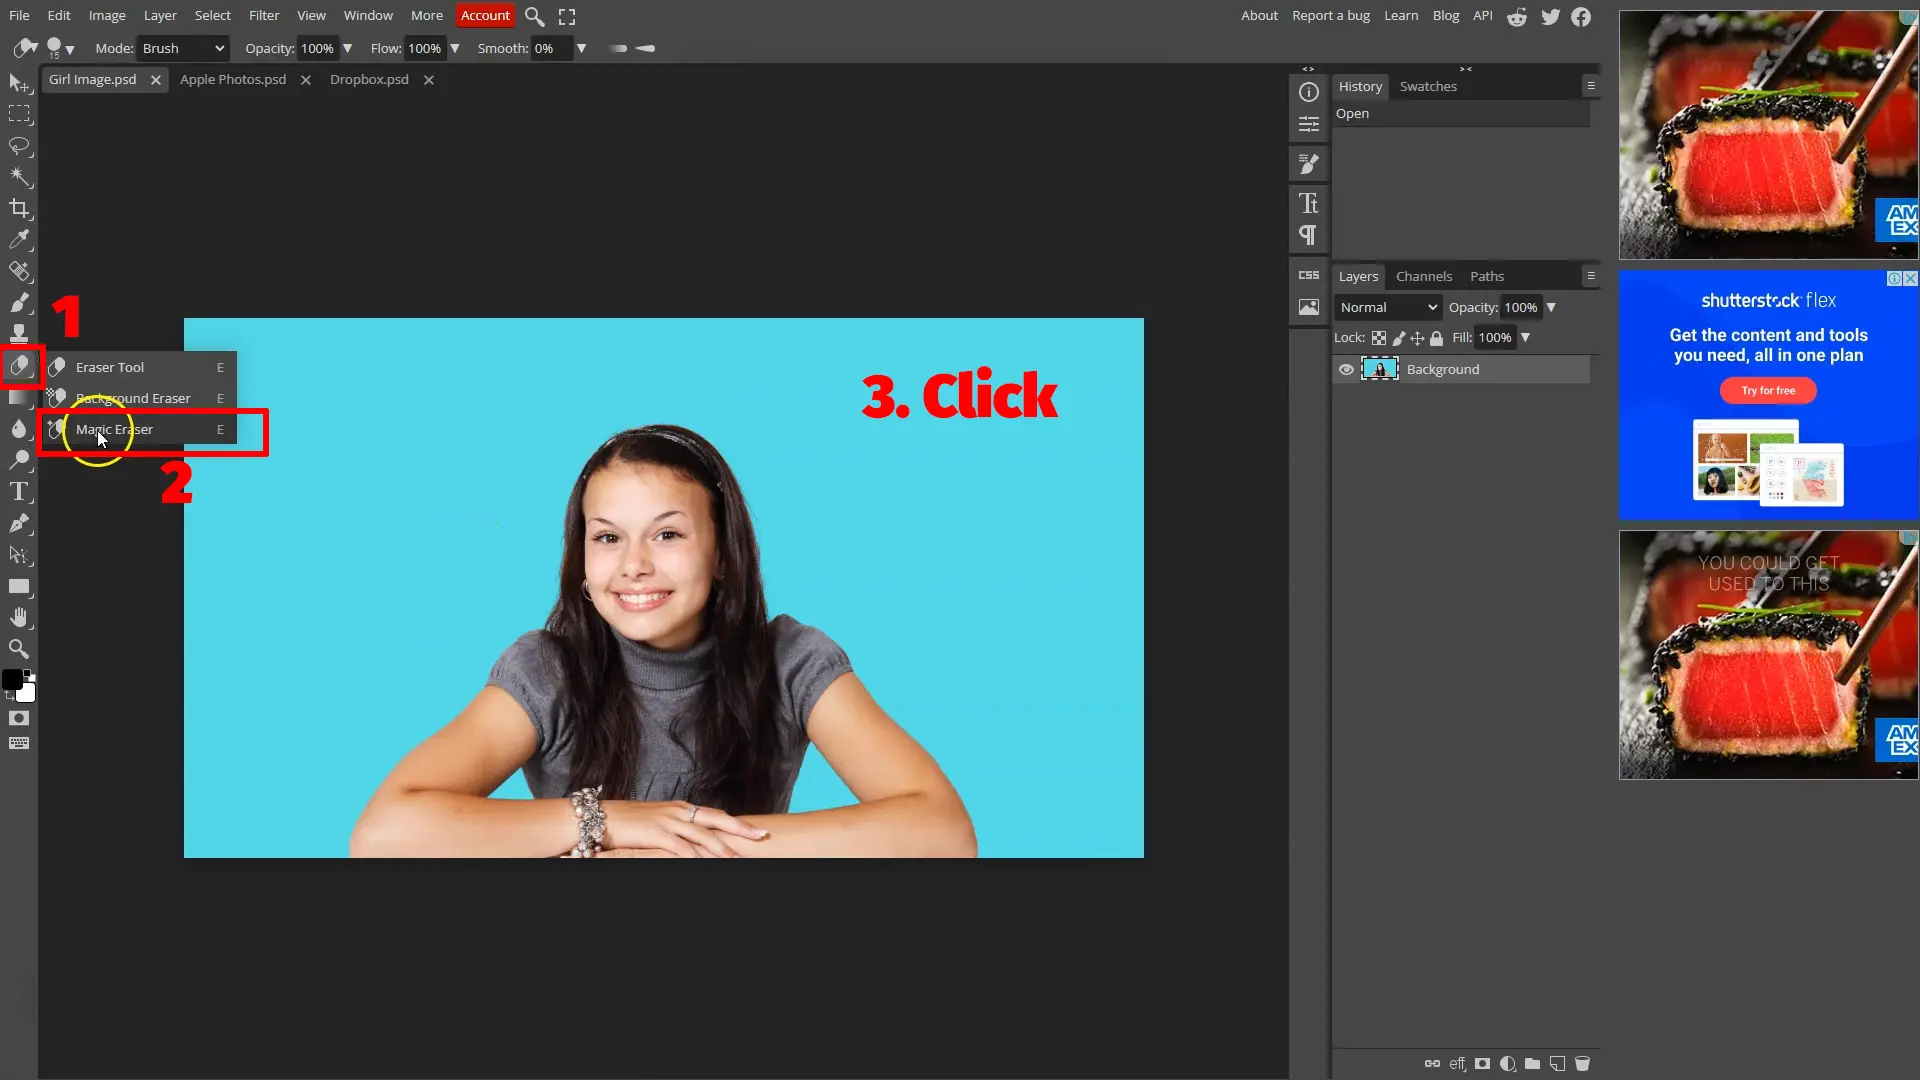
Magic Eraser
Best for simple images with solid backgrounds
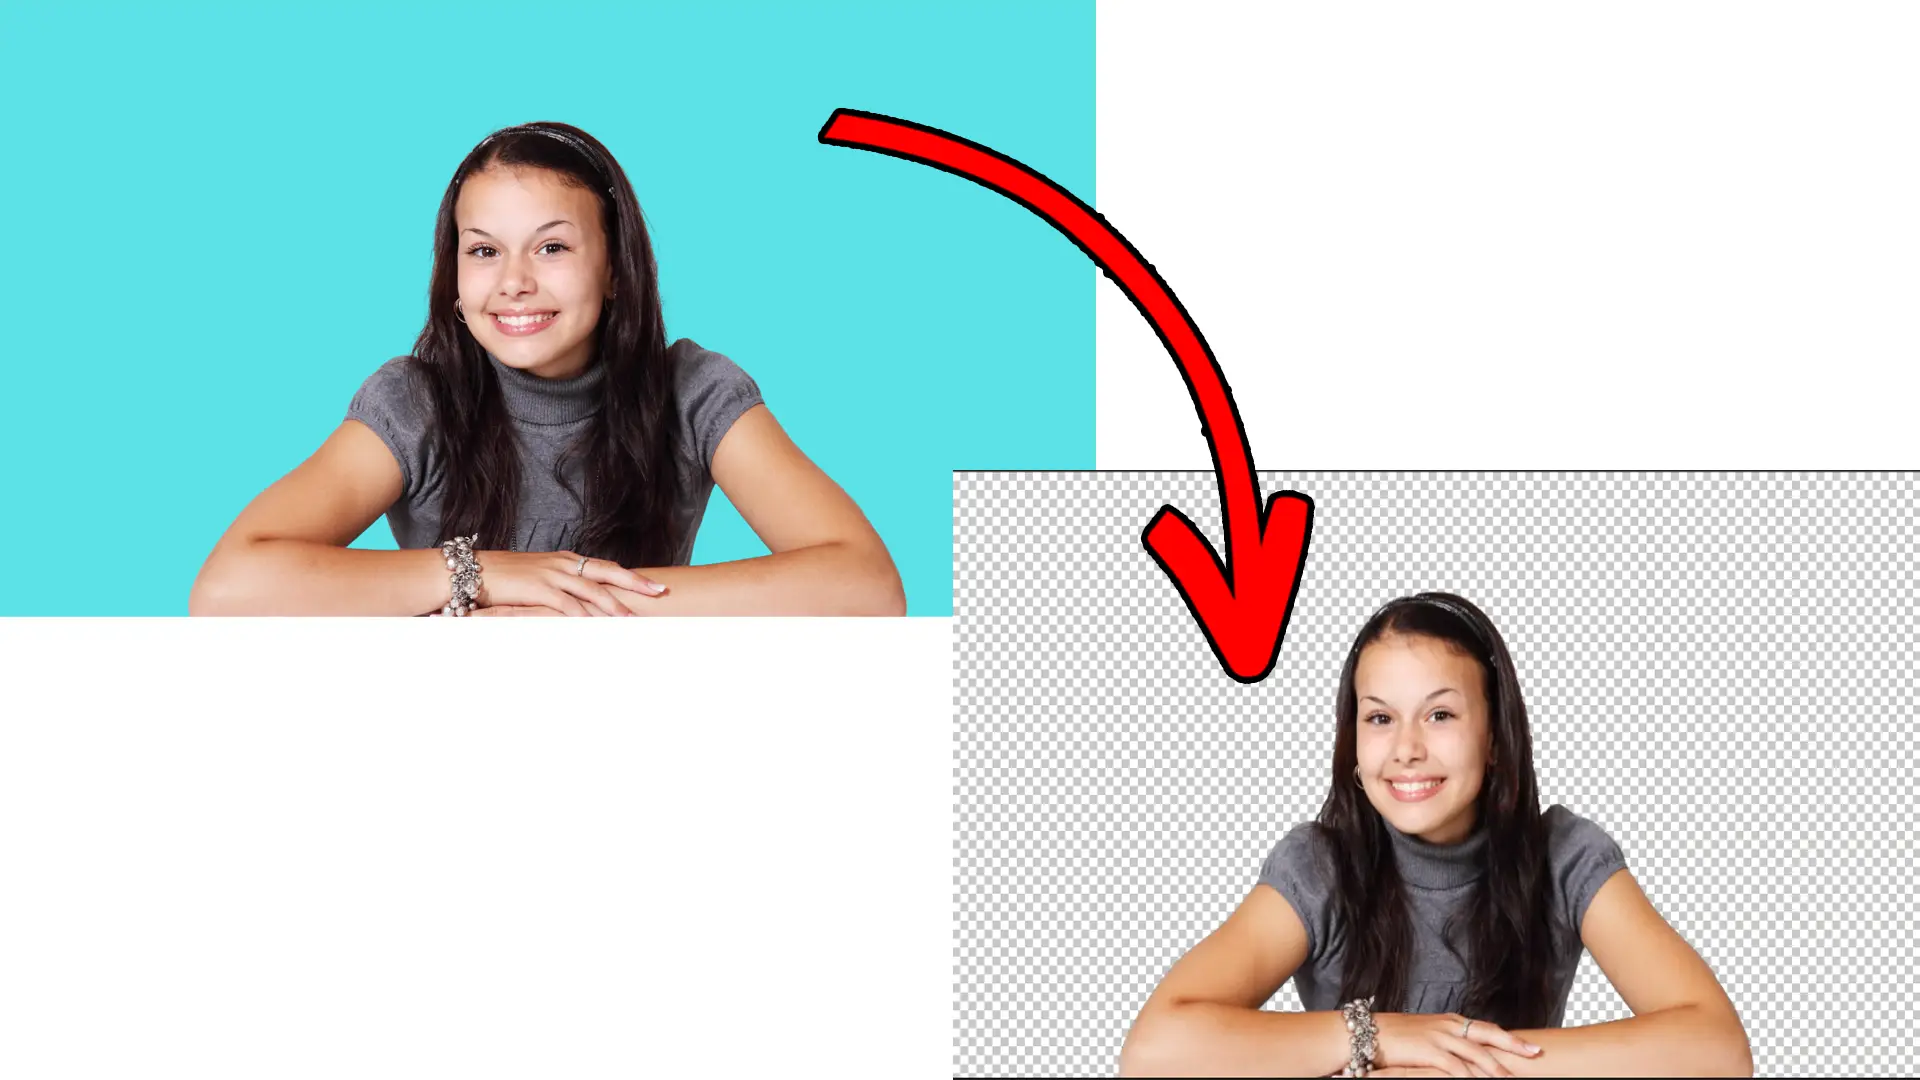
The second method is the easiest because all you need is one click. However, the method works with a one-color background like in the above image.
The method also works if you have multiple solid colors, but other methods suit other image types. Here is how to remove the background in Photopea using Magic Eraser:
- Find the Eraser tool and right-click on it
- Click on Magic Eraser
- Click on any solid color to remove the color
You can repeat the process to delete all solid colors. Zoom in to ensure the background is removed from the edges.
Sometimes, you must use the tool on the edges to complete the process. Here is an example image.
Related: Photopea Review
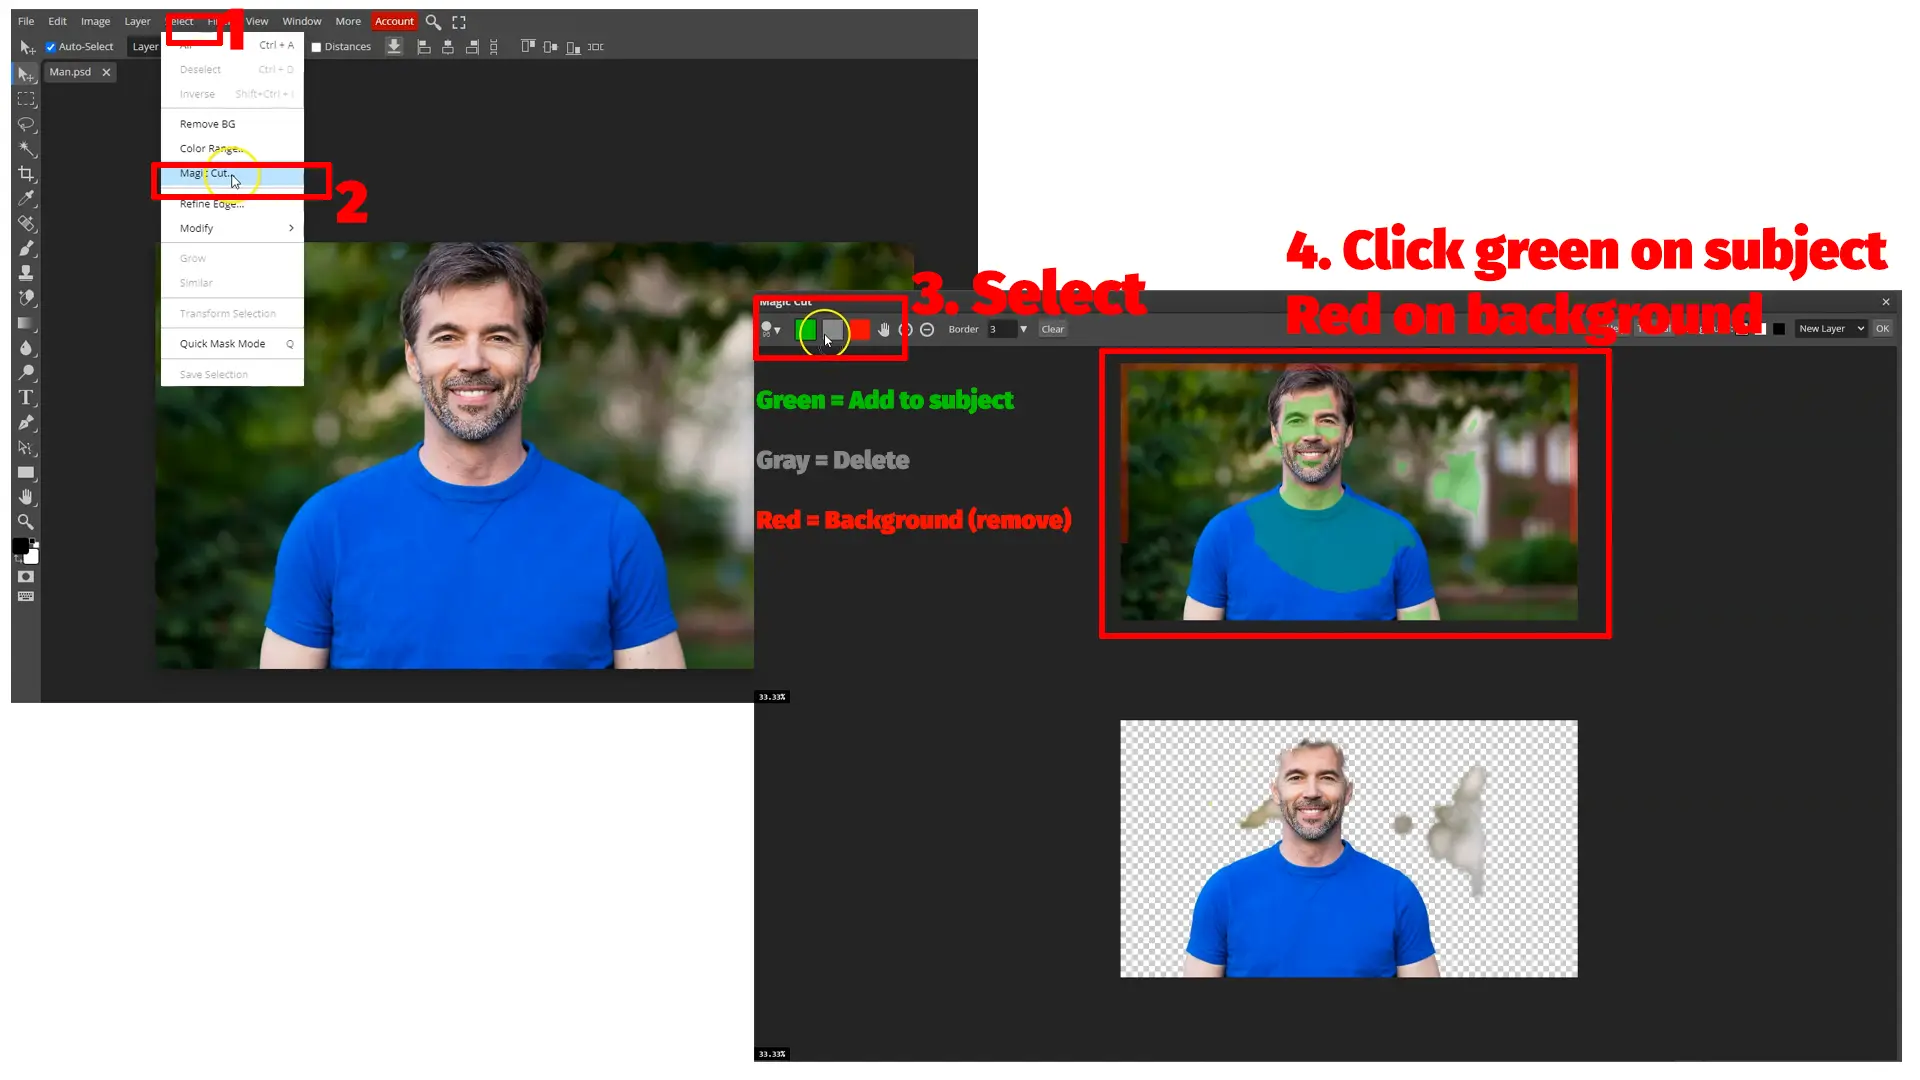
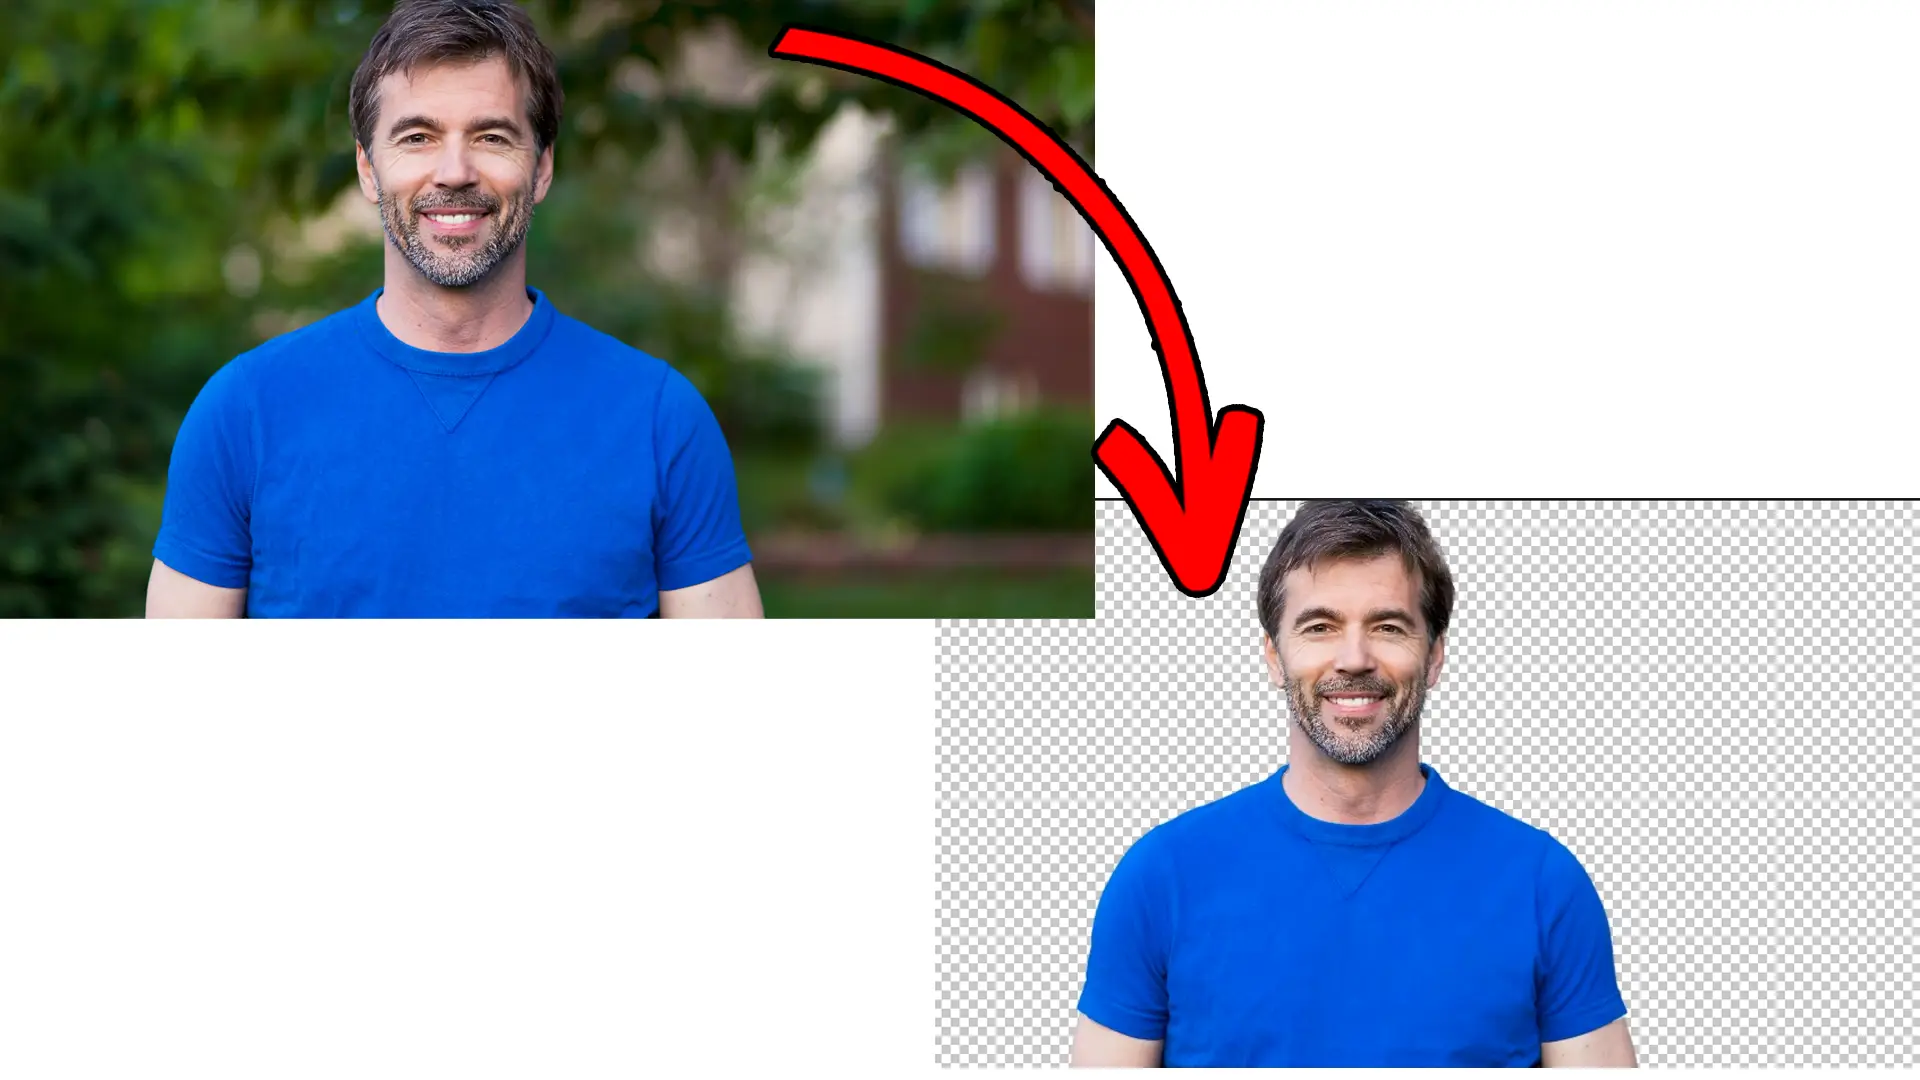
Magic Cut
The method is slightly complicated but works with many image types.
If the auto-background remover does not work, you can use the Magic Cut tool in Photopea.
It works perfectly on some images, while you need to interfere on some, but it gives you control, which is great.
Here is how to use Magic Cut in Photopea:
- Click on Select in the top navigation menu
- Click on Magic Cut (a window will pop up)
- Highlight the areas you want in green and the background in red
Once the whole background is removed, click OK on the top.
The green tool is for the subject or the area you want in the image, and the red is for the background.
You don’t need to highlight all the areas. Just highlight a tiny place, and the tool will adjust according to the surrounding colors.
Please note that the tool doesn’t like it if you highlight an area with both green and red tools, so if it gives you this message, remove that area with the gray (erase) brush.
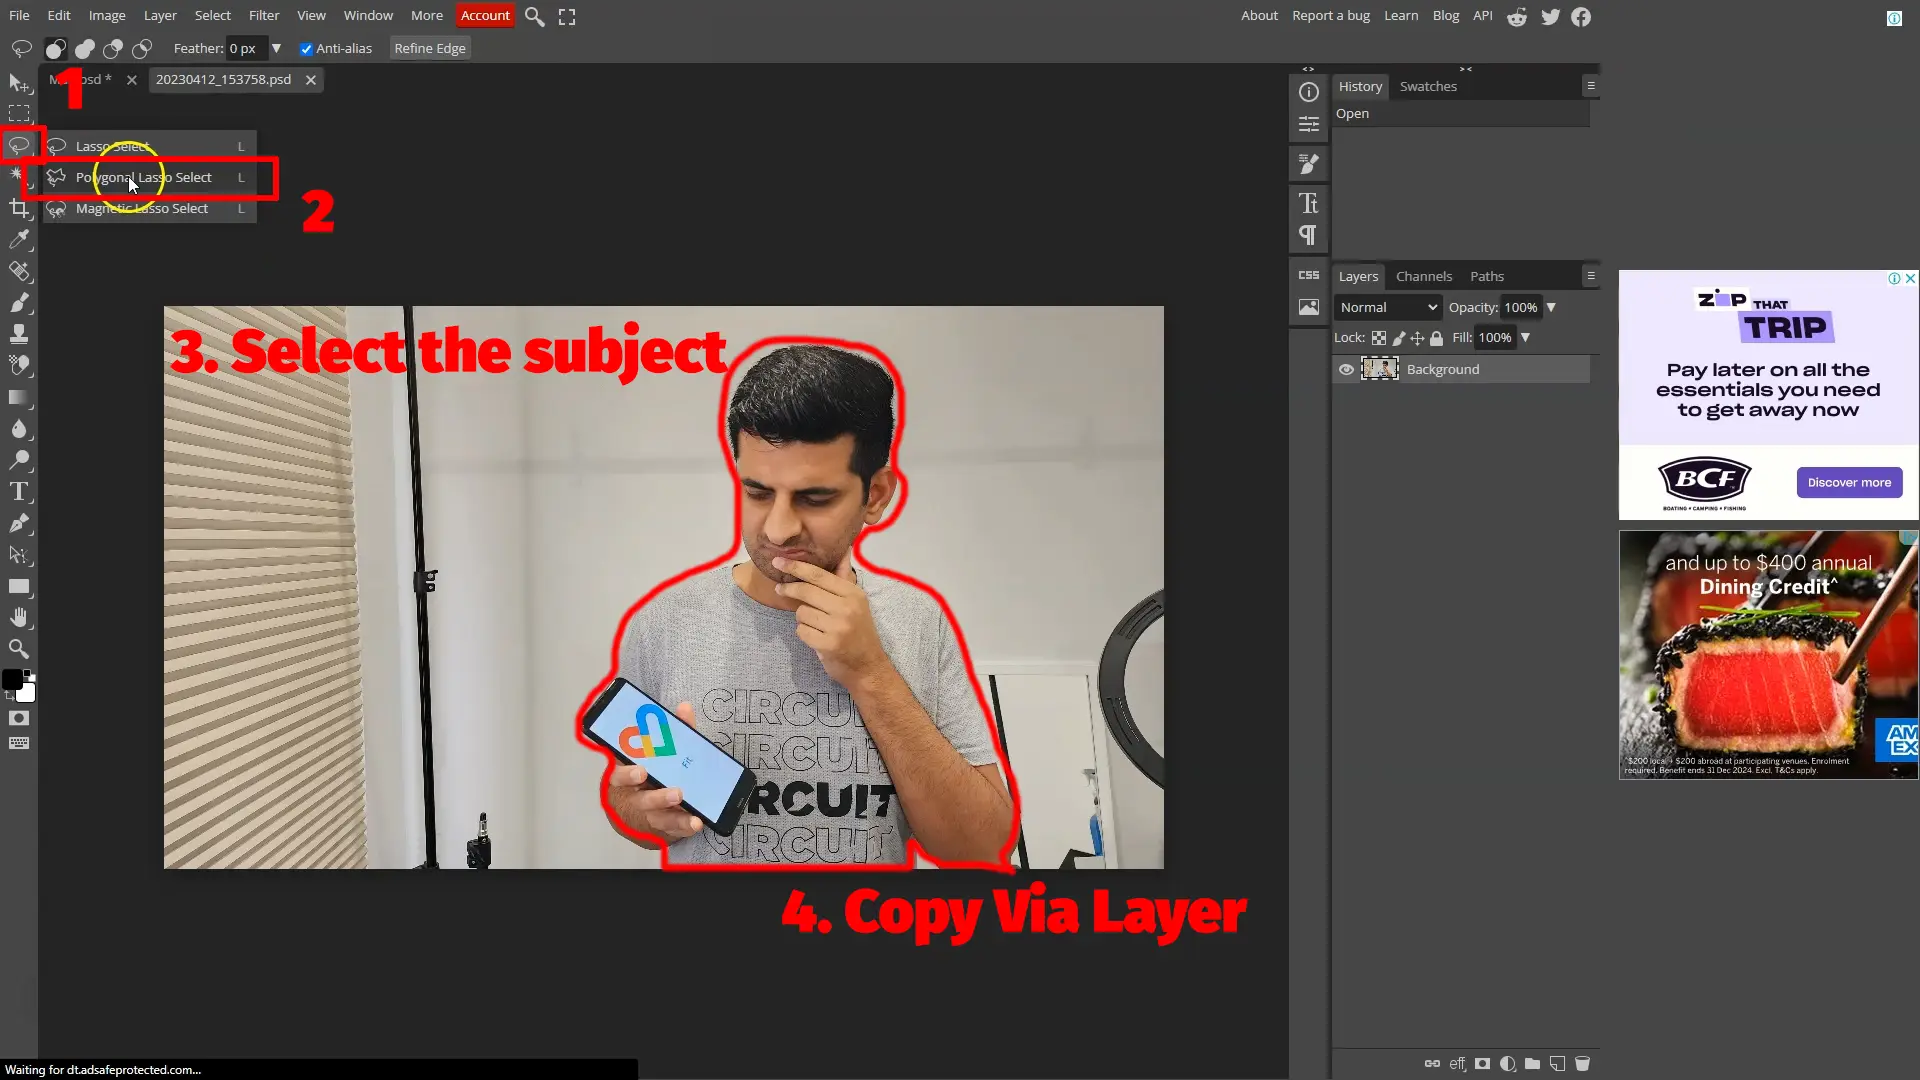
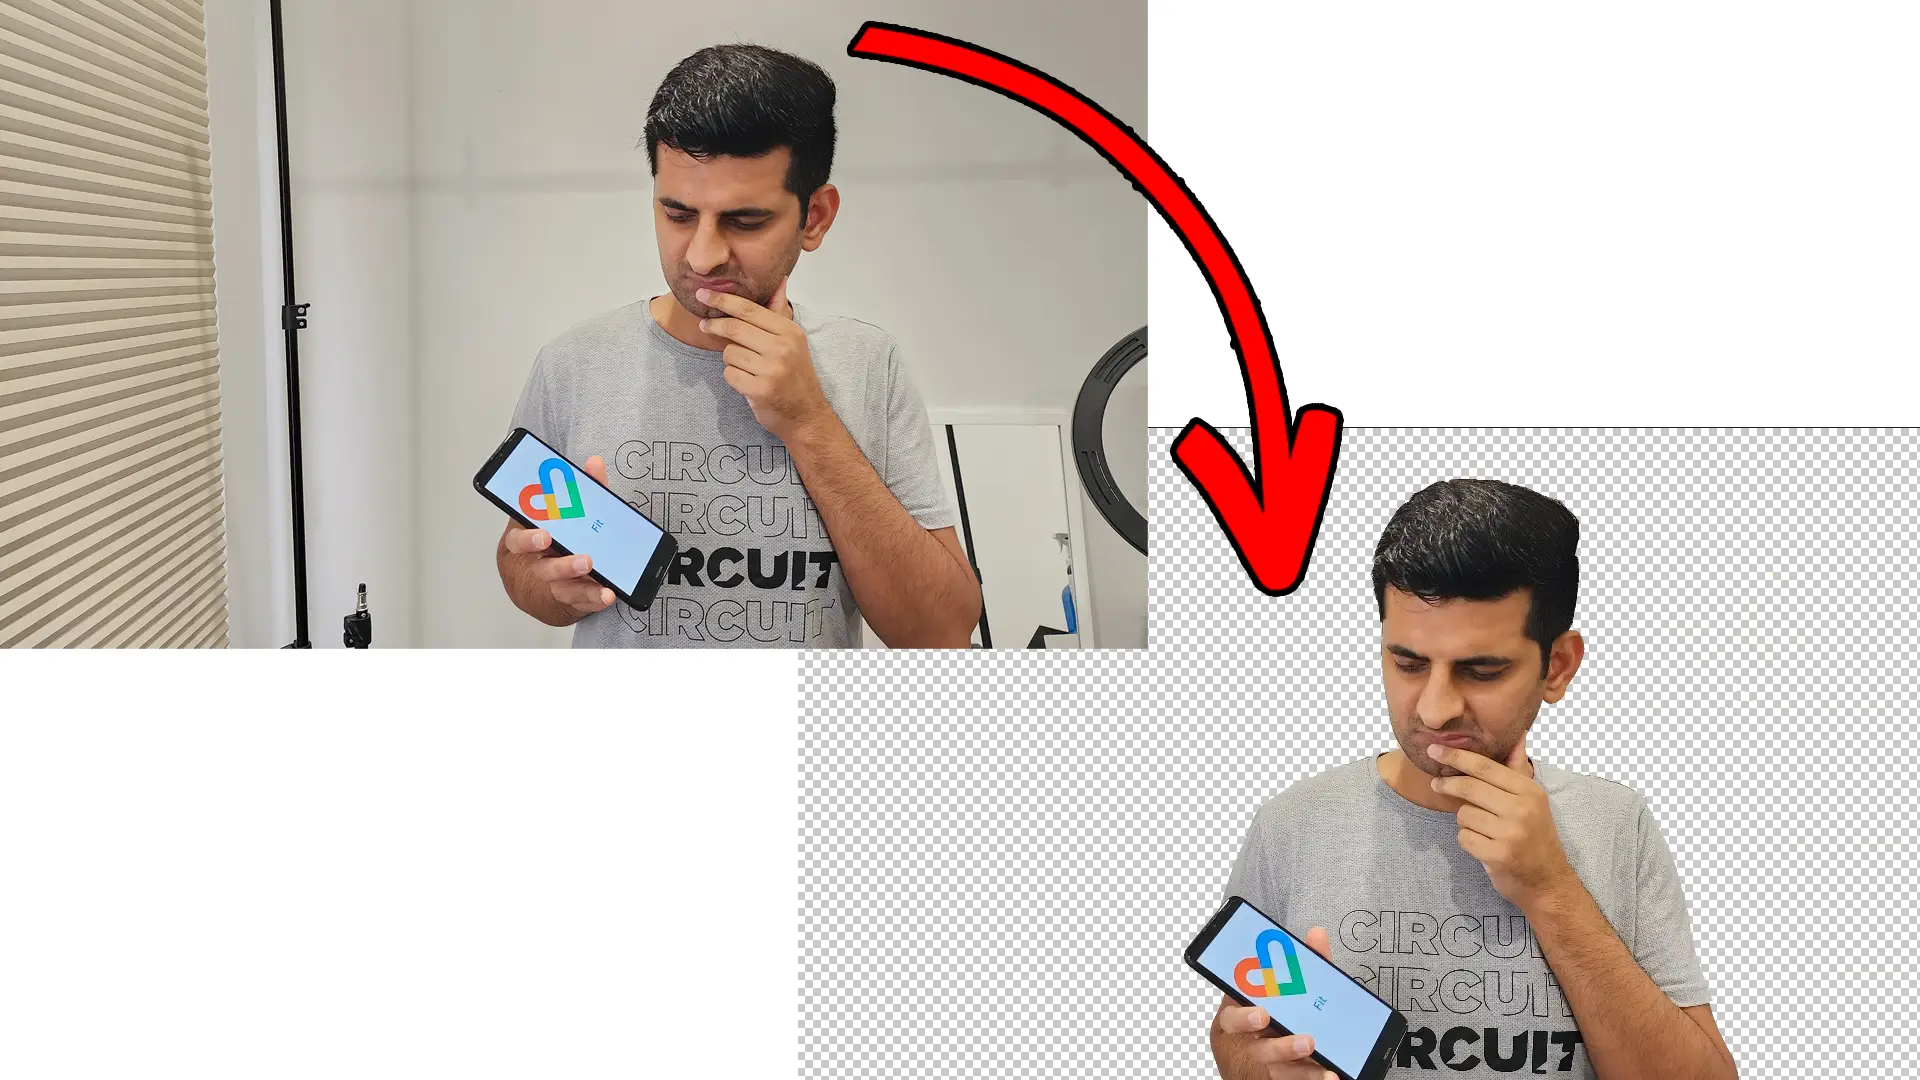
Polygonal Lasso Select
Time-consuming but gives you complete control.
The fourth way to remove the background in Photopea is the old-fashioned “Lasso Select.” Here is how to use it:
- Right-click on the third tool and select Polygonal Lasso Select.
- Click somewhere on the subject edge to make a point.
- Move the mouse cursor and make another point when the subject direction changes.
- Press Backspace to delete the last point and Esc to start over (if needed).
- Reach and match the last point with the first to make the subject a selection.
- Select a Selection tool.
- Right-click on the selection in the canvas.
- Click on Layer Via Copy to copy the subject onto a new layer.
You can delete the old layer or disable it.
The Lasso tool is method tedious, but it’s the best tool if you have a complex image with the same colors. Here is an image edited using this tool.
Saving images
Save the image in the PNG format to preserve the changes. Don’t choose the JPG/JPEG format, as JPG does not support transparency.
Summary
So, these were the four common ways to solve the question: how to remove background in Photopea. I hope the guide helped. Please share your thoughts and help me improve it.
Madhsudhan Khemchandani has a bachelor’s degree in Software Engineering (Honours). He has been writing articles on apps and software for over five years. He has also made over 200 videos on his YouTube channel. Read more about him on the about page.