With a rapid increase in the streaming industry, many tools have been introduced. Here, we have Twitch’s own Twitch Studio.
Many users have questions such as how to use Twitch Studio. This Twitch Studio Guide will help you answer some of them.
What is Twitch Studio
Twitch Studio is a free streaming and recording program specially designed for Twitch. You need a free
Twitch account to use it, and It is available on Windows PC, but you can download the beta version on Mac.
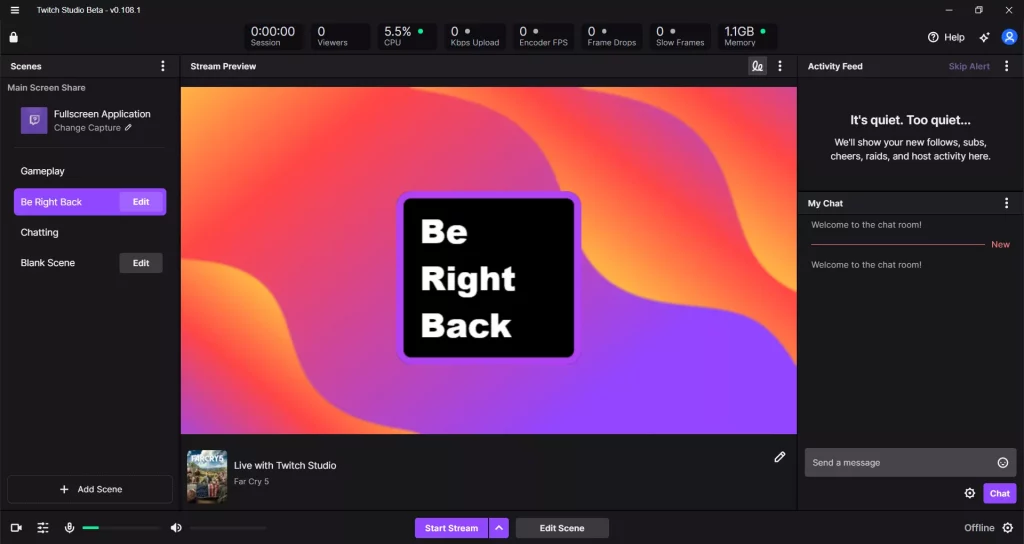
Scenes
Scenes are the screens that you stream. What’s visible in the scene is visible on the live stream.
In Twitch Studio, you can set scenes for breaks, gameplay, chatting, stream ending, etc., and quickly switch scenes with one click.
How to set up Twitch Studio
The best way to set up Twitch Studio is to let it optimize itself. When you first use the app, it shows a setup screen.
You can let it examine your hardware and internet connection and set the quality of the stream.
You can re-optimize the settings at any time in the Stream Quality settings, and if you like to take things into your own hands, you can manually adjust the stream quality settings.
Some of the stream options of Twitch Studio are:
- Preset: The combined resolution and frame rate options.
- Resolution: The option follows the Preset value, but you can manually change it.
- Frame rate: The frame rate also follows the Preset settings.
- Bitrate: This is the stream’s bitrate. The more bitrate, the faster internet it requires.
- Encoder: Leave it to Hardware if you have a good graphics card.
Layers in Twitch Studio
Twitch Studio layers are overlays that populate the scene. A scene is made up of those layers.
Some common layers are screen share, webcam, browser source, Twitch Alerts, Chat Box, Countdown, etc. Here are the details for each one:
Screen Share: The layer allows adding your game, window, or the whole monitor.
Webcam: The webcam layer adds a webcam box that can be repositioned.
Main Screen Share: The layer has the same features as screen share but can be linked to other layers.
Twitch Alerts: The common layer can alert you when you get new subscribers, cheers, or followers.
Browser Source: You can display a webpage with this source.
Text: A simple text can be displayed and repositioned.
Goal: Set a subscriber or follower goal and display it on the screen.
Chat Box: Display the Twitch chat in real time.
Countdown: A timer layer to count the time of an event or something.
Image: Display an image on the screen or add a background.
Media: Display an image or video or play audio on the screen. It comes with many pre-made stickers and sounds.
Solid Color: Display a solid color box.
Color Gradient: Display a color gradient box.
Adding a webcam to a scene
Adding a webcam is scene-dependent, so you must go to scene settings and add a webcam layer. Follow the steps to add a webcam to a scene on Twitch Studio:
- Click on Edit next to the scene name
- Click on Add Layer under Layer settings
- Choose webcam
- Add on Add
- Reposition your webcam
- Click Save
If you don’t see the webcam, you can refresh the device or change it. To the right of Twitch Studio, you will see Device options when the webcam is selected. Click on Refresh Device to refresh it.
If that does not work, click the “change” button and select the webcam you want to use. Click on done to close the window.
Adding webcam filters
Twitch Studio also offers webcam filters. The filter is specific to the webcam layer, so if you add another layer, the filter won’t be applied to that one. To add a camera filter, follow the steps:
- Click the webcam layer
- Click the Change button in the Device settings
- Click the side arrows to browse and choose filters
Recording screen
Twitch Studio supports recording the scene without streaming it on Twitch. Before recording, you must check the Stream Quality settings, as Twitch Studio uses the same settings for recording.
Under settings, click on Stream Quality. The option you should look at is Preset. If not 1080p60, click on the dropdown and select this option. This will ensure that the resolution and frame rate are the highest.
Saved recordings
By default, Twitch Studio videos are saved in the C:\Users\user\Videos\Twitch, but you can change the folder under the Recording settings of the software.
Blur image background
Many layers in Twitch Studio support the blur property. To blur the background, here are the steps:
- Activate the scene which contains the image
- Click on Edit next to the scene name
- Under layers, click on the image layer
- On the right side, click on the + sign to the right of the Blur property
- Click on Edit Blur
- Adjust the Blur slider
- Click on Save
Record mobile screen
Twitch has yet to offer a Twitch Studio mobile app. Until that happens, you can use tools like Streamlabs OBS to stream from your mobile phone.
How to delay your stream
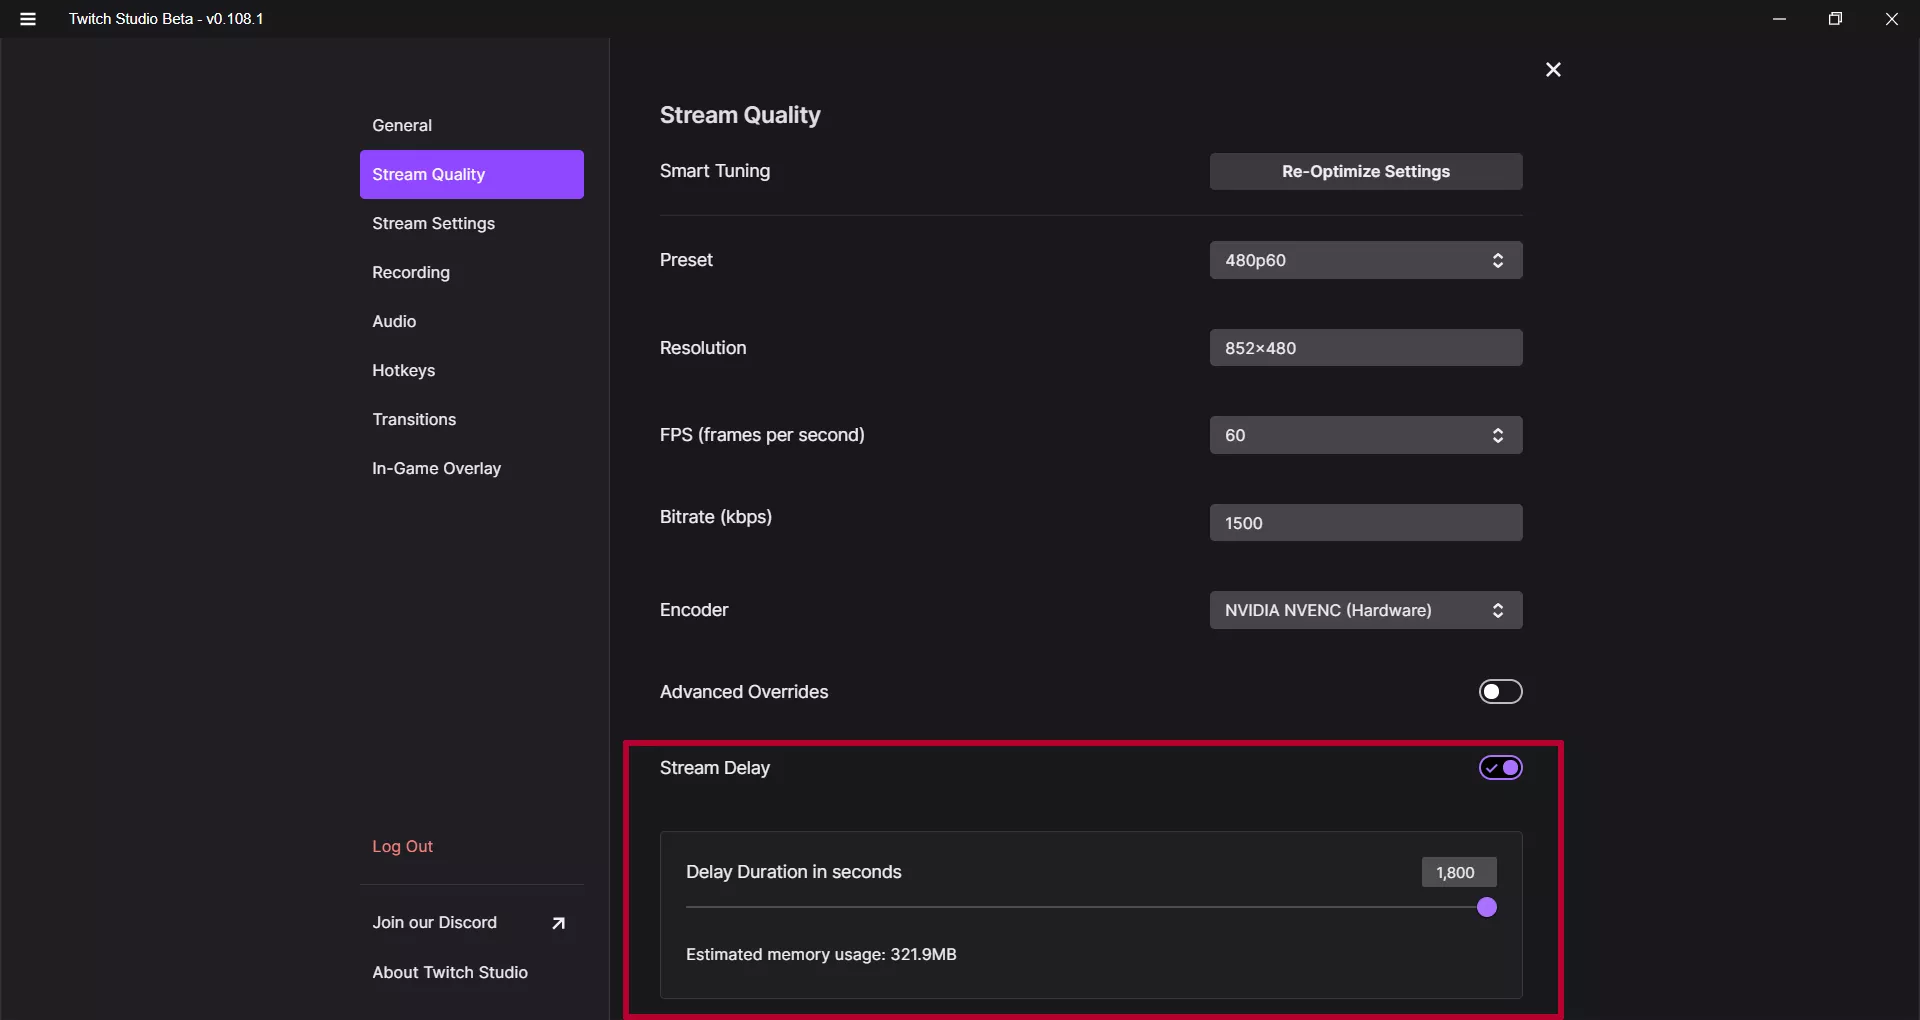
Twitch Studio has a streaming delay option for up to 1,800 seconds (30 minutes). The delayed stream is saved on the PC, and storage is required depending on the set time.
How does Twitch Studio compare with others
Twitch Studio is a simple program and has yet to reach its total capacity. It works fine if you want basic streaming options, but other programs exist with advanced features.
Check out its comparison with OBS and Streamlabs to see how it stands against those two industry experts.
Summary
Twitch Studio is still new and underdeveloped, so we see bugs and stuff, but it’s a fantastic tool to stream on Twitch straight from your PC.
I hope this Twitch Studio guide helped you find answers to your problems. Please share your thoughts in the comments, if any.
Madhsudhan Khemchandani has a bachelor’s degree in Software Engineering (Honours). He has been writing articles on apps and software for over five years. He has also made over 200 videos on his YouTube channel. Read more about him on the about page.